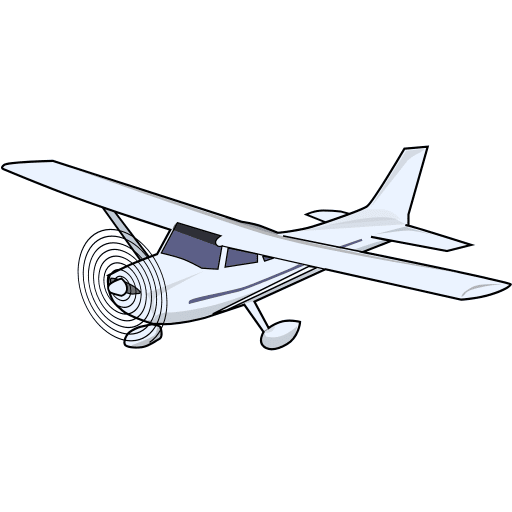

The objective of this practical pre-flight lesson is to review how to establish and maintain straight-and-level flight while under the supervision of a flight instructor. The exercise combines outside visual references, coordinated flight-control inputs, power and trim to maintain a selected heading, altitude and airspeed.
What Is Straight-and-Level Flight?
Straight-and-level flight combines two conditions at the same time: the airplane maintains a selected heading and a selected altitude.
Maintain the Heading
The airplane is not turning. Keep the wings level and use coordinated aileron and rudder corrections as required to remain on the selected heading.
Maintain the Altitude
The airplane is neither climbing nor descending. Maintain the pitch attitude and power required for the desired flight condition.
Straight-and-level flight applies the pitch, bank and yaw concepts introduced in the previous Aircraft Attitude: Pitch, Bank & Yaw pre-flight lesson.
How to Establish Straight-and-Level Flight
Build the Picture Outside First
Look outside and establish the visual picture of the airplane relative to the natural horizon. Use the nose to judge pitch attitude and the wings to judge whether the airplane is level.
Once the airplane appears stable, briefly cross-check the flight instruments to confirm heading, altitude, airspeed and coordination.
Establish and Maintain Straight-and-Level Flight
Your instructor will demonstrate the correct sight picture and appropriate power setting for the airplane being flown. Use the following sequence to establish and maintain the maneuver.
Select a reference ahead and compare the nose and wings with the natural horizon.
Use the elevator to establish the nose position that maintains level flight.
Use small, coordinated aileron and rudder inputs to keep the wings level and prevent the airplane from turning.
Use the power setting appropriate for the desired airspeed and flight condition.
Allow the airplane to settle. Make small, smooth corrections instead of continuously moving the controls.
Briefly confirm heading, altitude, airspeed and coordination on the instruments, then return your attention outside.
Once the airplane is stable, use trim to relieve the steady control pressure required to maintain the established attitude.
Check the Outside Picture
Each Control Has a Specific Job
The elevator controls pitch attitude, the ailerons control roll and the rudder controls yaw and coordination. Power changes the airplane's energy and influences airspeed and flight path. Once the desired condition is stable, trim relieves the continuous control pressure required to maintain it.
Do not memorize a universal nose position, power setting or trim position. These vary with the airplane, loading and flight condition. Use the sight picture and settings demonstrated by your instructor for the aircraft being flown.
Correcting a Heading Deviation
Straight flight means maintaining a constant direction. If the airplane begins to drift away from the selected heading, correct the deviation early with a small, coordinated bank and then return the wings to level.
Detect the Deviation Before It Becomes Large
Keep an outside reference point ahead of the airplane and monitor the relationship of both wings to the natural horizon. A small unintended bank is easier to recognize and correct outside than after a large heading error has developed.
Return to the Selected Heading
If you notice that the airplane is no longer tracking the selected heading, use this sequence. Keep the correction small and smooth.
Look outside. Identify which side of the desired direction the nose has moved and check whether the wings are still level.
Apply a small amount of aileron toward the desired heading and coordinate the roll with appropriate rudder pressure.
Use only the bank needed for the size of the heading error. A small deviation requires only a shallow, gentle correction.
As the nose approaches the desired direction, begin rolling the wings back toward level instead of waiting until the heading has already been reached.
Use coordinated aileron and rudder in the opposite direction to stop the roll and establish a wings-level attitude.
Confirm the outside reference first, then briefly check the heading indicator. If another correction is needed, make it small and smooth.
Correct Gently to the Right
Establish a small coordinated right bank. As the desired heading approaches, roll the wings level and neutralize the correction.
Correct Gently to the Left
Establish a small coordinated left bank. Begin leveling the wings as the airplane returns to the desired heading.
Banking the Wings Makes the Airplane Turn
With the wings level, lift acts primarily upward. When the airplane is banked, the lift vector tilts and develops a horizontal component. That horizontal component changes the airplane's direction.
The ailerons start and stop the roll. Rudder is coordinated with the ailerons to control yaw during the roll. Once the desired heading is reached, returning the wings to level stops the continuing turn.
Do Not Steer the Airplane with Rudder Alone
A heading correction in normal straight-and-level flight should not be made by simply pushing a rudder pedal and trying to point the nose in the desired direction. Use a small, coordinated bank to change heading, then return the wings to level.
Larger Heading Changes Become Turns
This section deals only with small corrections needed to maintain straight flight. The complete procedure for entering, maintaining and leaving a deliberate turn is covered in the Turn Pre-Flight Lesson.
Correcting an Altitude Deviation
Level flight means maintaining a constant altitude. If the airplane begins to climb or descend unintentionally, recognize the trend early and make a small pitch correction using the elevator.
Correct the Attitude — Do Not Chase the Altimeter
Use the nose-to-horizon relationship as your primary pitch reference. Correct the pitch attitude outside, allow the airplane to respond, and then use the instruments to confirm that the altitude trend is being corrected.
Return to the Selected Altitude
For a small altitude deviation during normal straight-and-level flight, use the following sequence. Keep the correction proportional to the size of the error.
Look at the outside sight picture and determine whether the nose has moved above or below the normal level-flight reference.
If the airplane is below the selected altitude, apply gentle back pressure to raise the nose. If it is above the selected altitude, apply gentle forward pressure to lower the nose.
Establish a small corrective pitch attitude and give the airplane time to respond. Avoid repeated or abrupt control movements.
Continue using the horizon and wingtips to prevent the altitude correction from introducing an unintended bank or heading change.
As the selected altitude approaches, begin returning the nose toward the normal straight-and-level sight picture so the airplane does not pass through the desired altitude.
Confirm that the altitude has stabilized and check airspeed, heading and coordination. Then return your attention outside.
If a new stable control pressure remains after the airplane has returned to the desired flight condition, adjust the trim to relieve that pressure.
Raise the Nose Slightly
Apply gentle back pressure to establish a small nose-up correction. As the selected altitude approaches, return to the normal level-flight pitch attitude and stabilize.
Lower the Nose Slightly
Apply gentle forward pressure to establish a small nose-down correction. As the selected altitude approaches, return to the normal level-flight pitch attitude.
Keep the Whole Flight Condition Under Control
Elevator Changes Pitch — Pitch Changes the Flight Path
Moving the elevator changes the airplane's pitch attitude. Raising the nose creates a flight condition that can move the airplane upward; lowering the nose can move the airplane downward.
Because pitch changes can also affect airspeed, the correction should normally be small. Once the desired altitude is reached, return to the pitch attitude and power combination needed for steady level flight.
Pitch and Power Must Work Together
For a small altitude deviation, a small pitch correction may be all that is required. If the correction begins to produce an unwanted airspeed change, or if a larger altitude correction is required, power may also need to be adjusted. Use the technique demonstrated by your instructor for the airplane being flown.
Avoid Overcorrecting
Too Many Corrections
Repeatedly moving the control column before the airplane has had time to respond often produces alternating climbs and descents. Make one measured correction, observe the result, then reassess.
Do Not Fly the Airplane with Trim
Use the elevator to establish the desired attitude first. Trim is used afterward to relieve steady control pressure — not as the primary control for correcting an altitude deviation.
See It → Correct It → Let It Respond → Stabilize
Detect the change in the outside sight picture, make a small pitch correction, allow the airplane to respond, anticipate the desired altitude, return to the normal level-flight attitude, then confirm the result with the instruments.
Watch Straight-and-Level Flight in Practice
Focus on how the pilot establishes the outside sight picture and makes small corrections to maintain straight-and-level flight.
Watch ForChanging Airspeed While Maintaining Level Flight
A useful straight-and-level exercise is to change airspeed while keeping the same altitude and heading. This requires coordinated changes in power, pitch and rudder while keeping the wings level.
A Power Change Requires a Control Response
If you change power and do nothing else, the airplane may change pitch, yaw, roll, altitude or a combination of these. Your job is to anticipate those tendencies and use the controls as required to keep the airplane straight and level while the airspeed changes.
Accelerate Without Climbing
Maintain the selected altitude and heading while allowing the airplane to accelerate to the new target airspeed.
Confirm the normal level-flight sight picture, wings level and selected heading.
Advance the throttle toward the power setting appropriate for the desired higher airspeed.
Apply forward elevator pressure as required to prevent the airplane from climbing as the power and airspeed increase.
In a typical single-engine propeller trainer, increasing power strengthens the left-turning tendencies. Apply right rudder as required to maintain heading and coordination, while using aileron as needed to keep the wings level.
As the target airspeed is reached, fine-tune the power and pitch attitude to maintain the desired speed and altitude.
Once the airplane is stable, trim to relieve the steady elevator pressure.
Slow Down Without Descending
Maintain altitude and heading while allowing the airplane to decelerate to the new target airspeed.
Confirm the level-flight sight picture, wings level and selected heading.
Reduce the throttle toward the power setting appropriate for the desired lower airspeed.
As the airplane slows, apply increasing back pressure as required to prevent a descent.
As power is reduced, the left-turning tendencies generally decrease. Adjust rudder pressure as required to keep the airplane coordinated and maintain the selected heading.
When the target airspeed is reached, adjust power and pitch as necessary to hold the new straight-and-level condition.
After the new speed and attitude are stable, trim the airplane to remove the steady control pressure.
Watch the Nose When You Move the Throttle
A power change does more than change airspeed. In a typical single-engine propeller airplane, it can also change the airplane's tendency to yaw and roll.
Watch the outside reference as you move the throttle. If the nose begins moving away from the selected direction, use the rudder pressure required to keep the airplane coordinated while maintaining wings level.
In a typical single-engine training airplane, adding power tends to increase the left-turning tendencies. Anticipate the change and apply right rudder as required to maintain heading and coordination.
Reducing power generally reduces the left-turning tendencies. Do not automatically push the opposite pedal. Adjust the rudder pressure according to what the airplane requires to remain coordinated.
Aircraft-specific: The amount of rudder required varies with aircraft type, power setting, airspeed and configuration. Learn the pressure and visual cues demonstrated by your instructor in the airplane you are flying.
Different Airspeeds Require Different Flight Conditions
Increasing power increases the airplane's available energy and allows the airspeed to increase. In a typical single-engine propeller airplane, the power change can also produce pitch, yaw and roll tendencies. Elevator, rudder and aileron pressures are therefore adjusted as required to prevent an unwanted climb, heading change or loss of coordination.
When power is reduced, airspeed begins to decrease. To continue producing the lift required for level flight at the lower airspeed, the airplane normally needs a higher angle of attack. The pilot therefore uses back pressure to establish the appropriate new pitch attitude while maintaining altitude.
Level Flight Does Not Always Mean the Same Pitch Attitude
At a lower airspeed, the nose may appear higher relative to the horizon even though the airplane is still maintaining altitude.
Do not try to reproduce one fixed nose position for every speed. Learn the sight picture associated with each stable flight condition in the airplane you are flying.
Confirm Straight-and-Level Flight on the Instruments
In visual flight, the instruments do not replace the outside references. Use them for brief cross-checks to confirm that the airplane is maintaining the desired altitude, heading and airspeed.
Outside → Instruments → Outside
Establish and maintain the airplane's attitude using the natural horizon and outside references. Then make a brief instrument cross-check and return your attention outside.
What to Check
Once the airplane appears straight and level outside, use short instrument glances to confirm that the desired flight condition is actually being maintained.
Confirm the normal nose-to-horizon picture, wings level and your selected reference ahead.
Glance at the altimeter. Determine whether the altitude is stable or whether a climb or descent is developing.
Confirm that the airplane remains close to the selected heading and that no unintended turn is developing.
Check that the airspeed is appropriate and stable for the selected power and flight condition.
Briefly confirm pitch, bank and coordination, then move your attention back outside.
Each Indication Answers a Different Question
Is the airplane maintaining the selected altitude or moving away from it?
Is the selected heading being maintained or is a turn developing?
Is the airplane maintaining the expected airspeed for the current flight condition?
Do the indications confirm the attitude established outside and coordinated flight?
The Display May Look Different
The illustration above shows a traditional six-pack panel. Modern training airplanes may display the same basic flight information on a Primary Flight Display. The principle remains the same: establish the visual attitude outside, then use the available flight indications to confirm aircraft performance.
Do Not Chase the Instruments
A small instrument movement does not require an immediate large control input. Look outside, assess the trend, make a measured correction if needed, allow the airplane to respond and then cross-check again.
Stabilize First — Then Trim
Trim is used to relieve the steady control pressure required to maintain an established flight condition. First fly the airplane with the primary flight controls. Once the desired pitch, altitude, airspeed and power setting are stable, adjust the trim to reduce the pressure you are holding on the elevator.
Do Not Use Trim to Establish the Attitude
Use the elevator to place the airplane at the desired pitch attitude and hold that attitude while the airplane stabilizes. Trim comes afterward. Its purpose is to reduce the continuous force you need to apply to the control column.
How to Trim the Airplane
Use this sequence whenever a new stable flight condition requires continuous elevator pressure.
Use pitch and power to establish the desired altitude, airspeed and attitude.
Maintain the required elevator pressure while the airplane settles into the new flight condition.
Check that altitude, airspeed and heading are no longer changing significantly before trimming.
Move the trim gradually in the direction that reduces the elevator pressure you are holding.
As the control force decreases, relax your grip slightly while continuing to maintain the desired attitude.
Make small final trim adjustments if necessary, then confirm altitude, heading, airspeed and coordination.
Trim Reduces Workload — It Does Not Replace the Elevator
When a new pitch attitude or airspeed requires continuous elevator pressure, the trim system changes the control force needed to maintain that condition. Properly trimmed, the airplane requires much less continuous pressure from the pilot, making it easier to maintain a stable attitude and devote attention to the outside scan and other cockpit tasks.
Three Trim Habits to Avoid
If airspeed or pitch is still changing, you may need to trim again immediately. Stabilize first.
Establish the attitude with the elevator. Do not use the trim wheel as the primary pitch control.
Make small adjustments. Large trim changes can create a new control pressure in the opposite direction.
Mistakes to Avoid in Straight-and-Level Flight
Most difficulties come from making corrections that are too large, looking inside for too long or failing to let the airplane respond before making another control input.
Keep your primary attention outside. Use the instruments for brief confirmation rather than continuous fixation.
Correct the outside pitch picture first, allow the airplane to respond and then verify the result.
Correct heading deviations with a small coordinated bank, then return the wings to level.
Small deviations usually require small corrections. Avoid abrupt or repeated control movements.
When power changes, monitor pitch, heading and yaw and use the controls as required to remain coordinated.
Establish the desired attitude and flight condition first. Trim only after the airplane has stabilized.
What to Remember Before You Fly
When your instructor gives you control of the airplane, keep the sequence simple. Build the visual picture outside, make small corrections and confirm the result.
Use the horizon, nose and wings to establish the sight picture.
Use the elevator to control the pitch attitude and correct altitude trends.
Use coordinated aileron and rudder inputs to maintain the selected heading.
Use the appropriate power for the desired airspeed and flight condition.
Confirm altitude, heading, airspeed and coordination, then return outside.
Relieve steady control pressure only after the airplane is established.
The Goal Is Stability, Not Perfect Numbers
Learn to recognize the correct visual picture, notice a trend early and make a small correction. Your instructor will show you the sight picture, power settings and tolerances appropriate for the airplane and stage of training.
Review Questions
Try to answer each question before opening the explanation. Focus on what you would actually see and do when controlling the airplane.
1 What does “straight-and-level flight” actually mean?
Straight means maintaining the selected direction without turning. Level means maintaining the selected altitude without climbing or descending.
2 How should you correct a small heading deviation?
Use a small coordinated bank toward the desired heading. As the heading approaches, roll the wings level and re-establish the outside reference. Avoid trying to steer the airplane with rudder alone.
3 What should you do when increasing power to accelerate in level flight?
Increase power smoothly, use elevator pressure as required to prevent an unwanted climb, keep the wings level and maintain coordination. In a typical single-engine trainer, increasing power strengthens the left-turning tendencies, so right rudder may be required.
4 What changes when you reduce power and slow down while remaining level?
As the airplane slows, use increasing back pressure as required to maintain altitude. The resulting stable level-flight attitude will normally be more nose-up. Rebalance rudder pressure as the power-related yawing tendencies change, then trim once stable.
5 Can the nose be above the normal cruise position while the airplane is still level?
Yes. At a lower airspeed, the airplane normally requires a higher angle of attack to maintain level flight. This can produce a noticeably higher nose-to-horizon sight picture without the airplane climbing.
6 When should you use trim?
First establish the desired flight condition using the primary flight controls and power. Once the airplane is stable, use trim to relieve steady control pressure. Remember: fly → stabilize → trim.
7 What should your visual scan look like in VFR straight-and-level flight?
Establish and maintain the airplane using outside visual references, make brief instrument cross-checks to confirm altitude, heading, airspeed and coordination, then return your attention outside: outside → instruments → outside.
8 What is the best response to a small altitude deviation?
Recognize the change in the outside sight picture, make a small pitch correction, allow the airplane to respond and anticipate the selected altitude. Avoid chasing every movement of the altimeter.
Can You Explain the Procedure From Memory?
Before getting into the airplane, you should be able to explain how you will maintain heading and altitude, change airspeed without leaving level flight, control yaw during power changes, cross-check the instruments and trim the airplane once the new condition is stable.
Gleim 2026 Deluxe Private Pilot Kit
A complete private pilot training package with study materials, an E6-B flight computer, plotter, pilot logbook and online training resources.
View the Private Pilot Kit →Affiliate link — StudyFlight may earn a commission from qualifying purchases, at no additional cost to you.
Climbing
Learn how pitch, power and airspeed are combined to establish a climb, maintain the desired climb condition and level off at a selected altitude.