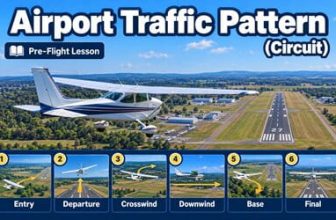
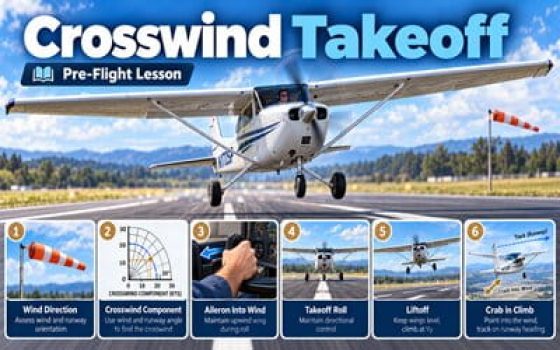
This pre-flight lesson covers the principles involved in taking off when the wind is not aligned with the runway.
It explains how to identify and evaluate a crosswind, understand the effect of wind on the airplane, and prepare for the different stages of a crosswind takeoff.
The lesson builds on the basic takeoff sequence covered in the Normal Takeoff Pre-Flight Lesson and on concepts introduced in the Side Slip Pre-Flight Lesson .
Aircraft limitations, recommended techniques and procedures must always be checked in the approved AFM/POH.
Learn how wind direction and runway orientation create headwind and crosswind components.
Learn how the crosswind component is determined and how it relates to the airplane and operating conditions.
Understand how a crosswind changes the takeoff compared with a normal takeoff before practicing the technique in the airplane.
Pilots cannot expect every takeoff to be made with the wind blowing straight down the runway. A crosswind, even a relatively small one, is a normal part of everyday flying.
A student pilot therefore needs to understand how crosswind conditions affect the airplane and how to recognize when those conditions become more demanding. Crosswind takeoffs are a basic skill needed to operate safely from real-world runways in changing wind conditions.
What Is a Crosswind?
Wind does not have to blow directly across a runway to create a crosswind. When the wind approaches the runway at an angle, part of its force acts along the runway and part acts across it.
The remaining part of the wind acts along the runway as either a headwind component or a tailwind component.
When the wind is aligned with the runway, almost all of the wind acts as a headwind or tailwind component.
An angled wind normally produces both a component along the runway and a crosswind component across it.
A wind blowing directly across the runway has no headwind component. Its full speed acts as the crosswind component.
A 20-knot wind does not automatically mean a 20-knot crosswind. The crosswind component depends on the angle between the wind and the runway. The next sections show how that component is determined.
The wind crosses the runway centerline from the airplane's left side toward its right side.
The wind crosses the runway centerline from the airplane's right side toward its left side.
Crosswind Component: Wind Direction, Angle and Speed
Before determining a crosswind component, the wind report must be interpreted correctly. The important information is the direction the wind is coming from, its speed, and the angle between that direction and the runway.
A wind reported as 360° comes from the north and blows toward the south, toward approximately 180°. It does not blow from 180° toward 360°.
360°
090°
180°
270°
Imagine standing at the center of a compass. The air arrives from the 360° side of the compass and moves toward the 180° side.
Similarly, a wind reported as 180° comes from the south and blows toward the north.
A useful way to read any wind report is to silently add the word “from”: “wind FROM 360°,” “wind FROM 240°,” or “wind FROM 090°.”
This means wind FROM 360° at 12 knots. The air is therefore moving from north toward south.
The first three digits describe the direction the wind comes from. The following digits give the wind speed.
An airplane departing approximately north on Runway 36 faces directly into a wind coming from 360°.
The same wind is now coming from behind an airplane departing approximately south on Runway 18.
A wind from the west crosses the path of an airplane departing north from its left side toward its right.
Compare the wind direction with the runway direction
The angle used to determine the wind components is the angle between the runway direction and the direction FROM which the wind is blowing.
Runway 27 ≈ 270°
Wind FROM 230°
Difference: 270° − 230° = 40°
The wind therefore meets the runway at an angle of approximately 40°. That angle and the wind speed can then be used to determine the headwind and crosswind components.
Always use the smallest angle between the two directions. For example, a wind from 330° on Runway 36 is 30° from the runway direction, not 330°.
In a U.S. METAR, wind direction is reported relative to true north. Runway designations, however, are based on magnetic direction.
Wind direction heard on U.S. ATIS or ASOS/AWOS radio broadcasts is reported relative to magnetic north.
When using a METAR to calculate the angle between the wind and the runway, do not automatically compare a true wind direction with a magnetic runway direction. Make sure both directions are expressed using the same reference.
The direction of the wind relative to the runway determines how much of the wind acts across the runway.
For the same wind angle, a higher wind speed produces a larger crosswind component.
How to Use a Crosswind Component Chart
Once the angle between the runway and the wind has been determined, a crosswind component chart can be used to separate the reported wind speed into its headwind and crosswind components.
Use the angle between the runway direction and the wind direction determined in the previous section.
Use the reported wind speed in knots for the conditions being evaluated.
The airplane is taking off approximately toward 360°. The wind is coming from 300°, which places it on the airplane's left side.
360° − 300° = 60°
The pilot therefore enters the chart with a 60° wind angle and a 20-knot wind speed.
The difference between Runway 36 and the wind from 300° is 60°. Find the 60° line on the chart.
Locate the curved wind-velocity line corresponding to 20 knots.
The point where the 60° line crosses the 20-knot arc is the reference point for reading both components.
Read downward for the crosswind component and to the left for the headwind component.
With a total wind speed of 20 knots, neither component can exceed 20 knots. If your chart reading does, check the wind angle, wind-speed arc and scales again.
Crosswind Limits and Aircraft Capability
Calculating the crosswind component is only the first part of the decision. The pilot must then determine whether that crosswind is appropriate for the airplane, the conditions and the pilot's own level of proficiency.
A calculated crosswind component should be compared with the information provided for the specific airplane in its approved AFM/POH. Do not assume that a number shown for another airplane applies to the airplane you are flying.
During aircraft certification, the airplane is demonstrated in crosswind conditions to show that it can be controlled satisfactorily under the conditions required for the certification test.
The resulting maximum demonstrated crosswind component may be published in the airplane's documentation.
A demonstrated crosswind value does not automatically mean that operation above that exact value is prohibited. Its status depends on how the aircraft manufacturer presents it in the approved aircraft documentation.
If a crosswind value is specified as an operating limitation for the airplane or a particular operation, that limitation must be respected.
The demonstrated value is not a crosswind that a student pilot should automatically attempt simply because it appears in the POH.
It is also not a guarantee that every pilot will be able to maintain adequate control in every runway, wind, gust or aircraft-loading condition at that value.
A steady crosswind and a rapidly changing or gusty crosswind of similar average strength can present very different levels of difficulty.
Runway conditions can affect directional control and the margin available if the airplane begins to drift away from the desired path.
A pilot should use a crosswind limit appropriate to current training, recent experience and demonstrated ability — not simply the largest number associated with the airplane.
Crosswind information can vary with aircraft model, version and approved documentation. For a Cessna 172, Cessna 152 or any other airplane, use the AFM/POH for the exact aircraft being flown rather than assuming that one published number applies to every version.
A student or less experienced pilot may need a much lower crosswind limit than the airplane's demonstrated capability. Personal limits should reflect training, proficiency, conditions and instructor guidance.
Why Aileron Into the Wind?
During a crosswind takeoff, the wind acts on the airplane from the side as well as from ahead. While the airplane is still on the runway, this side force can create a rolling tendency that must be opposed.
If this rolling tendency is not opposed, the upwind wing may rise and the airplane can become increasingly difficult to keep properly controlled during the takeoff roll.
The airplane's left wing is the upwind wing.
Moving the control into the wind raises the aileron on the upwind wing.
The resulting aerodynamic rolling moment helps oppose the tendency of the upwind wing to rise.
With the control wheel or stick moved into the wind, the aileron on the upwind wing moves upward. This reduces lift on that wing relative to the opposite wing.
The difference in lift produces a rolling moment toward the wind, opposing the crosswind's tendency to lift the upwind wing.
At the beginning of the takeoff roll, airflow over the ailerons is relatively low, so a larger control deflection is needed to produce a useful aerodynamic effect.
As airspeed increases, the same aileron deflection produces a stronger rolling effect. Less deflection is therefore required to maintain the desired wing attitude.
The controls work together during a crosswind takeoff, but they do different jobs. The exact coordination of aileron and rudder will be covered in the takeoff-roll procedure later in this lesson.
Before Takeoff: Wind, Runway and Aircraft Configuration
A crosswind takeoff begins before the airplane enters the runway. The pilot should know the current wind, understand how it relates to the runway being used, and complete the required aircraft checks and configuration before beginning the takeoff.
Review the available airport wind information before takeoff and look for changes in direction, speed and gusts.
A windsock can also provide an immediate visual indication of the wind near the runway.
The crosswind component depends on the relationship between the wind and the departure runway.
If another suitable runway provides a more favorable wind alignment, that option should be considered when operationally available.
Complete the normal before-takeoff checks and set the airplane configuration required by the approved AFM/POH.
Crosswind technique does not replace the normal checklist or manufacturer procedures.
Confirm where the wind is currently coming from.
Note both the steady wind and any reported gusts.
Compare the expected component with the aircraft information and your personal limits.
Consider surface condition and any factor that may reduce directional-control margin.
Review the applicable AFM/POH takeoff performance information for the actual conditions.
Confirm that runway entry and takeoff are appropriate before moving onto the runway.
If the wind direction or speed is changing, consider how the stronger or less favorable part of the reported range could change the crosswind component during the takeoff.
The value calculated from one steady wind report may not represent the most demanding crosswind the airplane will encounter during the actual takeoff roll.
There is no universal flap setting or configuration that applies to every crosswind takeoff. Use the approved AFM/POH and the airplane's checklist.
Complete all other required cabin, engine and before-takeoff checklist items before beginning the takeoff sequence.
If the wind, runway condition, aircraft information or pilot proficiency does not provide an adequate margin, choose a more favorable runway, wait for better conditions or do not attempt the takeoff. Good crosswind technique does not compensate for a poor pre-takeoff decision.
Crosswind Takeoff Roll — Step by Step
During the takeoff roll, the pilot must accelerate normally while continuously correcting for the crosswind. The two main objectives are to keep the wings under control and keep the airplane tracking straight along the runway.
Before the takeoff roll begins, position the ailerons fully into the crosswind.
At very low airspeed the ailerons have little aerodynamic effectiveness, so substantial control deflection is needed at the beginning of the roll.
Apply takeoff power smoothly and continuously as specified for the airplane.
As the airplane accelerates, keep your attention primarily outside while checking that engine indications and airspeed are developing normally.
Use rudder pressure as required to keep the airplane's longitudinal axis aligned with the runway centerline.
Do not use a fixed rule such as “always use right rudder.” The required rudder direction and pressure depend on the crosswind, the airplane's tendency to turn into the wind, and engine/propeller effects.
As airflow over the ailerons increases, they become more effective. Gradually reduce the initial control deflection while maintaining enough aileron into the wind to prevent the upwind wing from rising.
Do not automatically return the ailerons to neutral. Some correction normally remains necessary throughout the takeoff roll.
Continue adjusting aileron and rudder pressure as required while the airplane accelerates toward the appropriate rotation speed. Maintain runway alignment and keep the upwind wing under control rather than relaxing the crosswind correction in anticipation of liftoff.
The amount of aileron required changes continuously as the airplane accelerates and the flight controls become more effective. Use enough correction to control the upwind wing rather than moving the control toward a predetermined position.
If the upwind wing rises, more wing area is exposed to the crosswind and the airplane can begin moving sideways. Side-skipping can place severe side loads on the landing gear. Maintain sufficient aileron correction and precise directional control throughout the roll.
Crosswind Liftoff — Step by Step
Liftoff in a crosswind is a continuation of the corrections already established during the takeoff roll. The pilot must keep the airplane under positive control as the wheels progressively leave the runway.
Continue holding aileron into the wind and use rudder as required to maintain runway heading as the airplane transitions from rolling to flying.
As rotation approaches, continue using enough aileron into the wind to keep the upwind wing under control.
Do not neutralize the ailerons simply because the airplane is about to become airborne.
At the appropriate speed for the airplane, smoothly establish the takeoff attitude.
As the nosewheel leaves the runway, continue using rudder as required to keep the airplane's longitudinal axis aligned with the runway.
With aileron held into the wind, the downwind wing may rise slightly. The downwind main wheel can therefore leave the runway before the upwind main wheel.
The airplane may briefly continue the takeoff roll on the upwind main wheel. This is preferable to allowing the airplane to drift sideways across the runway.
In a significant crosswind, allow the airplane to remain on the runway slightly longer than during a normal takeoff so that liftoff can occur smoothly and positively under good control.
This helps avoid lifting off too early, drifting sideways, and then settling back onto the runway with a side load on the landing gear.
When the airplane is ready to fly, allow it to leave the runway smoothly and positively while maintaining the necessary aileron and rudder correction.
Once fully airborne, prevent sideways drift and begin the transition from the ground crosswind correction to the wind correction required for the initial climb.
Use the speeds and procedures appropriate to the airplane. The objective in a significant crosswind is to avoid lifting off too early with too little airspeed and to leave the runway under positive control.
A touchdown while the airplane is moving sideways can impose substantial side loads on the landing gear. Maintain the crosswind correction through liftoff and make a positive transition into flight.
Crosswind Initial Climb and Crab — Step by Step
Once the airplane is safely airborne, the ground crosswind correction is transitioned into a coordinated crab. The objective is to continue climbing while maintaining the desired ground track over the runway centerline.
After liftoff, smoothly transition from the aileron-and-rudder correction used during the takeoff to a coordinated wind-correction angle for the climb.
After a positive liftoff, establish the recommended initial climb attitude and airspeed for the airplane.
Continue monitoring the runway centerline outside the airplane. It provides an immediate visual reference for detecting wind drift.
As the airplane becomes established in flight, smoothly reduce the sideslip used during liftoff.
Use coordinated aileron and rudder to transition toward a wings-level climb while preventing the airplane from drifting away from the runway centerline.
Turn the airplane sufficiently into the wind to establish the wind-correction angle needed to stop sideways drift.
Once the correct crab angle is established, level the wings and maintain coordinated flight.
Adjust the crab angle as necessary so that the airplane continues along the extended runway centerline rather than drifting downwind.
The airplane's nose may therefore point slightly away from the runway heading even though its ground track remains aligned with the runway.
Maintain the climb airspeed, power and configuration specified for the airplane while continuing to correct for wind drift.
Complete the normal after-takeoff configuration and checklist according to the AFM/POH when workload permits.
The airplane is first turned into the wind to establish the required correction angle. It then continues the climb with the wings approximately level and the nose pointed sufficiently into the wind to maintain the desired ground track.
In a crosswind, the airplane's heading may be angled into the wind rather than exactly parallel to the runway.
The crab angle is adjusted so that the airplane's path over the ground remains along the extended runway centerline.
A correct crab angle is the angle that prevents drift. Continue comparing the airplane's ground track with the extended runway centerline and adjust the wind correction as conditions change.
Strong and Gusty Crosswinds
A steady crosswind is easier to predict. In strong or gusty wind, the wind can change quickly during the takeoff roll, liftoff and initial climb.
When the wind becomes stronger or weaker, the forces acting on the airplane also change. The pilot must adjust the controls as the conditions change.
This means wind from 240° at 12 knots, gusting to 22 knots. During a gust, the wind may therefore be much stronger than the steady wind speed.
When the wind suddenly becomes stronger, the airplane may experience an increase in airspeed and lift. When the gust becomes weaker, airspeed and lift can decrease.
A stronger crosswind may require more aileron correction. When the wind becomes weaker, less correction may be needed.
A change in wind strength or direction can make the airplane turn more or less toward the wind. Rudder pressure must be adjusted as needed.
After liftoff, a change in the wind may require a different crab angle to keep the airplane on the extended runway centerline.
In gusty conditions, the required aileron and rudder pressures can change several times during the takeoff. Make smooth corrections while watching how the airplane responds.
Keep most of your attention outside. Watch the wings, runway centerline and the airplane's movement over the ground.
Change aileron and rudder pressure as needed while keeping the airplane on the runway centerline.
Avoid lifting off too early when the airplane has only a small airspeed margin.
Change the crab angle as needed to remain on the extended runway centerline.
A strong gust can briefly increase the airplane's lift. If the airplane leaves the runway during that gust and the wind then becomes weaker, airspeed and lift can decrease quickly.
In strong, gusty conditions, a slightly higher liftoff speed may be appropriate. Use the speeds and technique specified for the airplane and follow instructor guidance.
Hangars, trees, hills and other obstacles can disturb the airflow. The airplane may therefore meet stronger, weaker or less steady wind during the takeoff roll and initial climb.
If the wind becomes too strong for the airplane, the pilot or the conditions, do not continue the takeoff. Use a more favorable runway, wait for better conditions or delay the flight.
Common Crosswind Takeoff Errors
Most crosswind takeoff errors come from using too little wind correction, removing the correction too early, or failing to control drift as the airplane becomes airborne.
Starting the takeoff roll with too little aileron into the wind can allow the upwind wing to rise before the controls become fully effective.
Returning the ailerons toward neutral too quickly can allow the upwind wing to rise as the airplane accelerates.
Incorrect rudder pressure can allow the airplane to move away from the runway centerline during the takeoff roll.
In a strong crosswind, becoming airborne too early can allow the airplane to move sideways and possibly touch the runway again.
Relaxing the crosswind correction as soon as the wheels leave the runway can allow the airplane to drift downwind.
After liftoff, trying to keep the nose exactly aligned with the runway can allow the airplane to drift away from the extended centerline.
A crosswind takeoff requires the airplane to remain under positive control throughout the roll and liftoff. If the airplane cannot be kept safely on the runway path, do not continue simply because the takeoff has already started. Use the procedure appropriate to the airplane and the situation.
During the roll, watch the centerline and the airplane's alignment. After liftoff, continue using the extended centerline to see whether the airplane is moving left or right with the wind.
Crosswind Takeoff Review Questions
Check that you understand wind direction, crosswind components, control inputs, liftoff and the initial climb. Try to answer each question before opening the answer.
These ten questions review the key points from the Crosswind Takeoff Pre-Flight Lesson.
A wind reported as 300° is coming from which direction?
Show Answer
Wind direction tells you where the wind comes from, not where it is going.
Runway 36 is being used and the wind is from 300°. What is the approximate wind angle?
Show Answer
Runway 36 is approximately 360°. The difference between 360° and 300° is 60°.
What two pieces of information are needed to use a crosswind component chart?
Show Answer
Find the angle between the runway and the wind, then use that angle with the wind speed to find the crosswind component.
Is a maximum demonstrated crosswind value always an aircraft operating limitation?
Show Answer
A demonstrated crosswind value may be published as information rather than as a limitation. Check the AFM/POH for the specific airplane.
The crosswind is coming from the left. Where should the aileron correction be applied at the beginning of the takeoff roll?
Show Answer
At the start of the takeoff roll, use full aileron into the crosswind. Reduce the deflection as airspeed increases, while keeping enough correction to control the upwind wing.
What is the main job of the rudder during the crosswind takeoff roll?
Show Answer
Use the amount and direction of rudder pressure needed to maintain a straight takeoff path.
During a crosswind liftoff, which main wheel may leave the runway first?
Show Answer
The airplane may briefly continue on the upwind main wheel while the crosswind correction is maintained.
Why can a gusty crosswind make liftoff more difficult?
Show Answer
A strong gust can increase lift, and then a weaker wind can reduce airspeed and lift. Control corrections may also need to change quickly.
What wind correction is normally used once the airplane is established in the initial climb?
Show Answer
After the takeoff correction is no longer required, establish the crab angle needed to prevent drift and continue the climb with the wings approximately level.
In a crosswind climb, why can the airplane's heading be different from its ground track?
Show Answer
The airplane may point slightly into the wind while its path over the ground remains along the extended runway centerline.
Want to go further? Continue with the related Pilot Institute training lesson for additional ground-school instruction on takeoff technique.
View the Training Lesson → Paid training course. Affiliate link — StudyFlight may earn a commission at no additional cost to you.