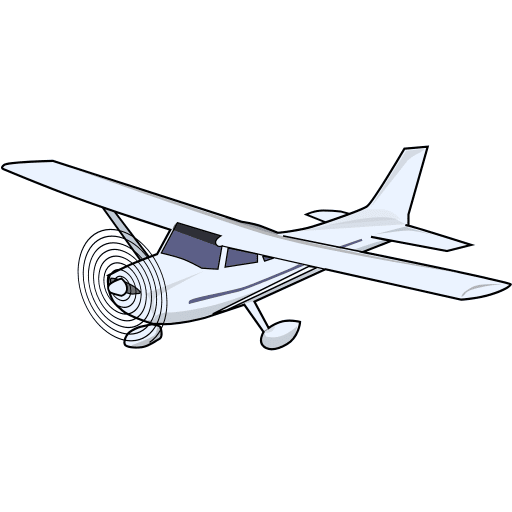

Aircraft Climb: Vx, Vy & Level-Off Pre-Flight Lesson

Training airplane climbing with Vx, Vy, pitch, power and flight instrument references
Pre-Flight Lesson Basic Flight Maneuvers
Lesson Objective

The objective of this practical pre-flight lesson is to prepare you to establish and maintain an aircraft climb under the supervision of your flight instructor. You will learn how pitch, angle of attack, power, airspeed, coordination and trim work together, how to perform a normal climb, and later how normal climb, Vx, Vy and en route climb differ.

What Is an Aircraft Climb?

A climb is a flight condition in which the airplane gains altitude. To establish a stable climb, the pilot combines an appropriate pitch attitude and power setting, allows the airspeed to stabilize and keeps the airplane coordinated.

Pitch Establish the Climb Attitude

Elevator pressure changes the airplane's pitch attitude and helps establish the outside sight picture required for the climb.

Power Provide Energy for the Climb

Additional power provides the energy needed to gain altitude while maintaining a useful climb airspeed.

Airspeed Stabilize at the Target Speed

Once climb power is established, pitch is adjusted as required to maintain the airspeed appropriate for the airplane and the type of climb.

Forces and Angle of Attack in a Climb

Before learning the control procedure, it is important to understand what changes as the airplane transitions from straight-and-level flight to an upward flight path.

The Four Forces Are Still Acting on the Airplane

Lift, weight, thrust and drag continue to act on the airplane during a climb. The airplane does not simply climb because lift remains greater than weight.

During the transition into the climb, the pilot changes pitch and increases power. Once a steady climb is established, the airplane follows a stable upward flight path and sufficient thrust is required to overcome the increased drag associated with climbing.

Lift Aerodynamic force produced by the wing
Weight Acts vertically toward the earth
Thrust Propels the airplane through the air
Drag Opposes motion through the air
Diagram showing lift, weight, thrust and drag acting on an airplane
Lift, weight, thrust and drag continue to act during the climb.

What Is Angle of Attack?

Angle of attack (AOA) is the angle between the wing's chord line and the relative wind.

The chord line is an imaginary straight line from the leading edge to the trailing edge of the wing. Relative wind flows opposite the airplane's flight path through the air.

Angle of attack therefore does not simply mean how high the nose appears above the horizon.

Wing diagram showing chord line, relative wind and angle of attack
Angle of attack is measured between the wing chord line and the relative wind.
Angle of attack illustration
Important Distinction

Pitch Attitude Is Not the Same as Angle of Attack

Pitch attitude describes the airplane's orientation relative to the horizon. Angle of attack describes the angle between the wing chord line and the relative wind.

Because the relative wind follows the airplane's flight path, a nose-up pitch attitude does not tell you the exact angle of attack. Pitch attitude and angle of attack are related, but they are not interchangeable.

Entering the Climb

What Happens When You Raise the Nose?

As you apply back pressure to transition from level flight, the pitch attitude increases. During this transition, the wing's angle of attack increases and lift increases temporarily, causing the flight path to curve upward.

As the airplane becomes established on the new upward flight path, the relative wind changes with that flight path. The relationship between pitch attitude and angle of attack therefore changes again.

If you simply raise the nose without adding sufficient power, the airplane trades airspeed for altitude and the airspeed decreases. A sustainable powered climb therefore requires an appropriate combination of pitch and power.

Remember: pitch attitude is referenced to the horizon. Angle of attack is the angle between the wing chord line and the relative wind.

Previous lesson: This maneuver builds directly on Straight-and-Level Flight . You will begin from a stable flight condition before transitioning to the climb.

How to Establish a Normal Climb

A normal climb is the routine climb technique recommended for the airplane you are flying. The exact airspeed, pitch attitude and power setting are aircraft-specific, but the control sequence follows the same basic logic.

Procedure — Step by Step

Establish and Maintain the Climb

Begin from stabilized straight-and-level flight unless your instructor specifies another entry. Keep your attention outside while using brief instrument cross-checks to confirm the result.

1
Look Out and Clear

Check the airspace ahead and around the airplane before changing pitch. Confirm the area is clear and maintain awareness throughout the climb.

2
Raise the Nose and Add Power

Smoothly apply back pressure to establish the climb attitude while increasing power to the recommended climb setting. Use the nose-to-horizon relationship as your primary visual reference.

3
Maintain Coordination

As power increases and airspeed decreases, anticipate stronger left-turning tendencies in a typical single-engine propeller airplane. Apply right rudder and aileron pressure as required to keep the airplane coordinated and the wings level.

4
Establish the Climb Airspeed

Allow the airplane to transition onto the upward flight path. Use small elevator adjustments to establish and maintain the target climb airspeed specified for the airplane and the type of climb being performed.

5
Stabilize the Sight Picture

Hold a consistent nose-to-horizon relationship, keep the wings level and maintain the selected heading. Avoid chasing the airspeed indicator with repeated pitch changes.

6
Cross-Check

Briefly confirm climb airspeed, heading, rate of climb, coordination and engine indications. Then return your attention outside.

7
Trim

Once the climb attitude, airspeed and power are stable, trim to relieve steady elevator pressure. Continue flying the airplane with the primary controls.

What You Should See

Build the Climb Picture Outside

Nose A stable nose-up attitude relative to the horizon
Wings Wings level unless a climbing turn is intended
Direction The selected outside reference remains ahead
Why the Airplane Reacts This Way

Pitch, Power and Airspeed Work Together

During the transition into a climb, raising the pitch attitude changes the wing's angle of attack and redirects the airplane onto an upward flight path. Without an appropriate increase in power, airspeed decreases.

Once climb power is established, elevator pressure is used to fine-tune the climb attitude and airspeed. In a typical single-engine propeller airplane, high power combined with lower airspeed also strengthens left-turning tendencies, which is why additional right rudder is commonly required.

Aircraft-Specific

Use the POH and Your Instructor's Values

There is no universal normal-climb airspeed, pitch attitude or power setting. Use the procedures and values specified for the airplane you are flying. Later in this lesson, we will compare normal climb speed with Vx, Vy and en route climb speeds.

Climb Performance

Climb Speeds Explained: Normal Climb, Vy, Vx & En Route Climb

There is no single climb speed for every situation. The airspeed you use depends on what you are trying to achieve: routine climbing, maximum altitude gain in the least time, maximum altitude gain over the shortest horizontal distance, or a practical en route climb.

Normal Climb

The Routine Climb

A normal climb is performed at the airspeed recommended by the aircraft manufacturer for routine climbing. It is generally faster than Vy and provides a less nose-high attitude than a maximum-performance climb.

When maximum climb performance is not required, this additional airspeed provides several practical advantages.

Better forward visibility
Better engine cooling
Greater control authority
Training airplane established in a normal climb attitude
A normal climb balances useful climb performance with visibility, cooling and aircraft control.
Maximum-Performance Climbs

Vy and Vx Answer Two Different Questions

Vy

Best Rate of Climb

Vy is the airspeed that provides the greatest gain in altitude in a given amount of time.

Think “How can I gain altitude as quickly as possible?”
Vx

Best Angle of Climb

Vx is the airspeed that provides the greatest gain in altitude over a given horizontal distance.

Think “How can I gain the most altitude before reaching that point ahead?”
Vy = Time
Most altitude in the least time
Vx = Distance
Most altitude over the shortest horizontal distance
Best angle of climb illustration showing altitude gained over horizontal distance
Best angle of climb is about gaining the greatest altitude over a given horizontal distance.
Important

Vx and Vy Are Aircraft-Specific

Do not memorize a Vx or Vy value from another airplane. Use the speeds published in the AFM/POH for the aircraft you are flying. The correct values can vary with aircraft model, configuration and operating conditions.

Cessna 172 Climb Speed

What Is the Climb Speed of a Cessna 172?

There is no single climb speed that applies to every Cessna 172 model and every climb condition. Normal climb, Vy and Vx use different target speeds, and published values can differ between 172 variants and operating conditions. Use the POH for the specific airplane you are flying rather than relying on one generic Cessna 172 number.

En Route Climb

Climbing When Maximum Performance Is Not Required

An en route climb may be flown at an airspeed selected for a useful balance of climb performance, visibility, cooling, comfort and progress toward the destination.

Unlike Vx or Vy, the objective is not necessarily to maximize altitude gain over distance or time. Follow the aircraft manufacturer's recommended procedures and the climb technique demonstrated by your instructor.

Quick Comparison

Which Climb Are You Trying to Perform?

Climb Main Goal Practical Idea
Normal Climb Routine climb Balance performance with visibility, cooling and control.
Vy Maximum altitude gain per unit of time Think time.
Vx Maximum altitude gain per horizontal distance Think distance / obstacle clearance.
En Route Climb Practical climb during the en route phase Balance climb performance with other operational considerations.
Instrument Cross-Check

Confirm the Climb on the Instruments

Establish and maintain the climb primarily with outside visual references. Then make brief instrument checks to confirm that the airplane is maintaining the intended airspeed, attitude, direction and climb performance.

Use the Instruments to Confirm What You See Outside

The nose-to-horizon relationship gives you the primary visual indication of the climb attitude. The flight instruments then confirm whether the airplane is actually climbing at the desired airspeed and remaining on the intended heading.

Do not fix your attention on one instrument. A climb is a complete flight condition, so the cross-check should move briefly between the important indications before your attention returns outside.

Flight instruments showing indications during an airplane climb
Flight instruments used to confirm the climb established with outside visual references.
Practical Cross-Check

What to Check During the Climb

Use short glances inside the cockpit to confirm the flight condition, then return your attention outside.

Airspeed Is the target climb speed being maintained?

If the airspeed is wrong, make a small pitch correction using the outside sight picture, then cross-check the result.

Attitude Does the pitch indication support the outside view?

The attitude indicator helps confirm pitch and bank, but the natural horizon remains the primary visual reference in VFR flight.

Altitude Is altitude increasing toward the selected altitude?

Monitor the altimeter so you know your progress and can begin the level-off before reaching the selected altitude.

Vertical Speed Is the airplane producing a positive rate of climb?

Use the vertical speed indication as a performance cross-check rather than as the primary means of controlling pitch.

Heading Is the airplane maintaining the intended direction?

Confirm that no unintended turn is developing while you maintain the outside reference ahead.

Coordination Is the airplane coordinated?

Check coordination briefly and adjust rudder pressure as required while keeping the wings and heading under control.

Primary Reference Outside Sight Picture

Establish and maintain the climb attitude primarily by looking outside at the relationship between the nose and horizon.

Confirmation Flight Instruments

Use brief instrument checks to verify airspeed, heading, altitude change, attitude and climb performance.

Correction Return to the Outside Picture

Make small control corrections using outside references, allow the airplane to respond, then cross-check again.

VFR Technique

Outside → Instruments → Outside

Establish the climb outside, glance inside to confirm airspeed, altitude, heading, coordination and performance, then return your attention outside. Do not try to maintain the entire climb by staring at the instrument panel.

Maintaining the Climb

Controlling Airspeed and Coordination in a Climb

Once the airplane is established with the appropriate climb power, your job is to maintain the target climb airspeed, heading and coordination. In an established climb, small changes in pitch are used to correct airspeed while the power remains at the selected climb setting.

Key Principle

Change the Pitch — Then Give the Airplane Time to Respond

Use the natural horizon to make a small pitch correction, hold the new attitude briefly and then cross-check the airspeed. Airspeed does not change instantly when you move the elevator, so avoid making another correction before the airplane has had time to respond.

Practical Corrections

What to Do if the Climb Airspeed Is Wrong

Airspeed Too Low

Lower the Nose Slightly

If the airplane is climbing slower than the target airspeed, the pitch attitude is generally too high for the established power setting.

1
Look Outside

Recognize that the nose-to-horizon picture is higher than needed for the desired climb.

2
Lower the Pitch Slightly

Apply a small amount of forward elevator pressure and establish a slightly lower nose attitude.

3
Hold and Wait

Maintain the new sight picture and allow the airspeed to begin increasing.

4
Cross-Check and Stabilize

As the target airspeed returns, establish the pitch attitude that maintains it and re-trim if a steady pressure remains.

Airspeed Too High

Raise the Nose Slightly

If the airplane is climbing faster than the target airspeed, the pitch attitude is generally too low for the established power setting.

1
Look Outside

Compare the nose position with the climb sight picture demonstrated by your instructor.

2
Raise the Pitch Slightly

Apply a small amount of back elevator pressure and establish a slightly higher nose attitude.

3
Hold and Wait

Maintain the new attitude and allow the airplane time to decelerate toward the desired climb airspeed.

4
Cross-Check and Stabilize

When the target airspeed is reached, hold the corresponding climb attitude and trim only after the condition is stable.

Common Student Error

Do Not Chase the Airspeed Indicator

Make one small pitch correction, hold the new attitude and give the airplane time to accelerate or decelerate. Repeated rapid pitch corrections usually create larger airspeed and altitude variations instead of fixing the original deviation.

Yaw & Coordination

Why More Right Rudder Is Often Needed in the Climb

In a typical single-engine propeller trainer, the combination of high power, a nose-up attitude and lower airspeed increases the airplane's left-turning tendencies. Without correction, the nose may yaw left and the airplane may also tend to roll left.

What You May See The nose drifts left

Your outside reference no longer remains directly ahead even though you intended to climb straight.

What You Do Apply right rudder as required

Increase right rudder pressure only enough to maintain coordinated flight and the selected direction.

What You Confirm Heading, wings and coordination

Keep the wings level with aileron as required and use the coordination indication as a cross-check.

Coordination Check

Keep the Climb Straight and Coordinated

Outside Reference stays ahead
Wings Remain level
Rudder Pressure as required
Cross-Check Coordinated flight

Do not memorize a fixed amount of right rudder. The required pressure changes with power, airspeed, pitch, configuration and aircraft type. Apply the pressure needed to keep the airplane coordinated rather than simply pushing the pedal to a predetermined position.

Remember Climb power set → airspeed low: lower the nose slightly → airspeed high: raise the nose slightly → maintain coordination → stabilize → trim.
Level-Off Technique

How to Level Off from a Climb

Do not wait until the airplane reaches the selected altitude before lowering the nose. Begin the level-off slightly before the target altitude so that the airplane reaches it as the level-flight attitude is established.

When to Begin

Begin the Level-Off Before Reaching the Selected Altitude

A useful starting point is to begin the level-off at an altitude approximately equal to 10 percent of the current rate of climb below the selected altitude. The exact point may vary with the airplane, climb rate and how smoothly the maneuver is performed.

Example 500 fpm → 50 ft Begin the level-off approximately 50 ft early
Procedure — Step by Step

Transition from Climb to Straight-and-Level Flight

Begin the maneuver before reaching the selected altitude, establish the level-flight attitude smoothly and allow the airplane to accelerate before setting cruise power.

1
Begin Before the Selected Altitude

As the selected altitude approaches, use the current rate of climb to determine when to begin the level-off. Do not wait until the altimeter already indicates the target altitude.

2
Lower the Nose Smoothly

Apply forward elevator pressure and transition from the climb sight picture toward the normal straight-and-level attitude. Make the change smoothly rather than abruptly.

3
Level Off at the Selected Altitude

Establish the level-flight pitch attitude as the airplane reaches the selected altitude. Use small elevator corrections to prevent continuing the climb or descending below the target altitude.

4
Keep Climb Power Temporarily

Do not immediately reduce the throttle. Maintain the climb power setting while the airplane accelerates toward the desired cruise airspeed.

5
Maintain Coordination

As the nose lowers and airspeed increases, adjust rudder pressure as required to keep the airplane coordinated and maintain the selected heading.

6
Set Cruise Power

As the airplane approaches the desired cruise airspeed, reduce power smoothly to the cruise setting specified for the airplane.

7
Stabilize and Trim

Re-establish the straight-and-level sight picture, confirm altitude, heading and airspeed, then trim to relieve any remaining steady elevator pressure.

Why Keep Climb Power?

First Establish Level Flight — Then Let the Airplane Accelerate

During the climb, the airplane is flying slower than its normal cruise speed. When you lower the nose to the level-flight attitude, retaining climb power temporarily helps the airplane accelerate toward cruise airspeed.

If you reduce power immediately at the beginning of the level-off, the airplane accelerates more slowly. Establish the level attitude first, allow the airspeed to build, then set cruise power and trim.

Rudder During the Level-Off

Expect the Rudder Requirement to Change

A climb in a typical single-engine propeller airplane often requires noticeable right rudder. As the pitch attitude lowers, airspeed increases and power is eventually reduced, the left-turning tendencies change. Gradually adjust rudder pressure as required rather than continuing to hold the same amount used in the climb.

Common Student Errors

Three Level-Off Mistakes to Avoid

Too Late Waiting Until the Target Altitude

If you begin the maneuver only after reaching the selected altitude, the airplane will usually continue climbing through it.

Too Abrupt Pushing the Nose Down Quickly

Use a smooth pitch change. An abrupt transition makes altitude and airspeed control more difficult.

Power Reducing Power Too Early

Establish level flight and allow the airplane to accelerate before reducing to the desired cruise power setting.

Remember Begin before the selected altitude → lower the nose smoothly → level off at the selected altitude → accelerate → adjust rudder → set cruise power → stabilize → trim.
Aircraft Performance

Factors Affecting Climb Performance

The airplane will not climb at the same rate under every condition. Temperature, altitude, weight, aircraft configuration and available engine power can all change the amount of climb performance available.

Major Performance Factor

High Density Altitude Reduces Climb Performance

Density altitude describes how the airplane “feels” the surrounding air from a performance standpoint. When density altitude is high, the air is less dense and the airplane generally accelerates and climbs less effectively.

Engine Less power may be available from a normally aspirated piston engine
Propeller The propeller produces less thrust in less-dense air
Result Rate of climb and overall climb performance decrease
Conditions associated with higher density altitude: higher elevation, higher temperature, lower atmospheric pressure and, to a lesser extent, higher humidity.
Other Important Factors

What Else Can Reduce the Rate of Climb?

Weight

A Heavier Airplane Climbs Less Effectively

A heavier airplane requires more aerodynamic force and more power to achieve the same climb performance. As weight increases, the available climb performance generally decreases.

Configuration

Flaps Can Add Significant Drag

Extended flaps increase lift but also increase drag. Depending on the airplane and flap setting, that extra drag can reduce climb performance. Use the configuration specified in the POH for the climb being performed.

Drag

Extended Landing Gear Increases Drag

On a retractable-gear airplane, extended landing gear creates additional drag and can substantially reduce climb performance. Follow the aircraft-specific gear retraction procedure.

Available Power

Engine Configuration Matters

Anything that reduces available engine power can reduce climb performance. Mixture, carburetor heat and other engine controls should therefore be set according to the aircraft manufacturer's procedures and the current operating conditions.

What You Will Notice

The Same Pitch Attitude Does Not Guarantee the Same Climb

On a hot day, at a high-elevation airport or with a heavily loaded airplane, the aircraft may climb much more slowly than it did during a previous flight. Do not expect one familiar sight picture or one familiar rate of climb to produce the same performance under every set of conditions.

Before Flight

Check the Performance Charts

Use the AFM/POH performance data for the specific airplane to determine expected climb performance for the actual weight, pressure altitude, temperature and configuration. Published charts are more useful than relying on a rule of thumb or what the airplane achieved on a previous flight.

Remember Hotter + higher + heavier + more drag = less climb performance.
Safety & Lookout

Safety and Lookout During a Climb

A nose-up attitude reduces your view of the airspace directly ahead. During a climb, continue an active traffic scan and monitor the engine regularly while maintaining the flight path already established.

Traffic Lookout

Do Not Let the Nose Hide the Airspace Ahead

The higher nose position can obscure traffic directly ahead. Clear the surrounding airspace before entering the climb and continue looking for traffic throughout the maneuver.

Before the Climb Clear the Area

Check ahead, to both sides and around the airplane before raising the nose and beginning the climb.

During the Climb Keep Scanning

Continue searching the surrounding airspace for traffic instead of allowing your attention to remain inside the cockpit.

Ahead Remember the Blind Area

Be especially aware of the airspace hidden by the nose-up attitude and use the lookout technique demonstrated by your instructor.

Prolonged Climbs

Periodically Check the Airspace Hidden by the Nose

During a prolonged climb, your instructor may demonstrate an appropriate technique for improving the view ahead, such as a brief change in pitch or heading when conditions permit. Any such maneuver should be performed smoothly while maintaining control, situational awareness and the required flight path.

Engine Monitoring

Monitor the Engine During the Climb

A climb places the engine at a relatively high power setting for an extended period. Include the appropriate engine indications in your regular scan and confirm that the airplane continues to operate normally.

Power Confirm the Expected Power Setting

Verify that the engine is producing the power expected for the climb and that the selected setting remains appropriate for the airplane.

Indications Check the Engine Gauges

Monitor the engine indications applicable to your airplane and verify that they remain within the normal operating range.

Changes Notice Anything Unusual

Pay attention to unexpected changes in engine sound, power, temperature, pressure or other indications relevant to the aircraft you are flying.

Aircraft-Specific

Engine Controls Depend on the Airplane and Conditions

Mixture, carburetor heat, cowl flaps and other engine controls are not handled identically in every airplane or at every altitude. Use the AFM/POH checklist and the procedures taught by your instructor rather than applying one universal climb configuration.

Remember Clear the airspace → keep scanning for traffic → remember the area hidden by the nose → monitor the engine throughout the climb.
Common Errors

Common Mistakes to Avoid During a Climb

A good climb should be stable, coordinated and predictable. Most problems begin when the pilot makes corrections too aggressively, focuses too much on the instruments or forgets that pitch, power, airspeed and coordination all work together.

Airspeed Chasing the Airspeed Indicator

Repeated pitch changes do not give the airplane enough time to respond. Make a small correction, hold the new attitude and then cross-check the result.

Pitch Raising the Nose Too Much

An excessively high pitch attitude causes the airspeed to decrease. Use the outside sight picture and the target climb airspeed to establish the correct attitude.

Coordination Forgetting Rudder

High power and lower airspeed can increase left-turning tendencies in a typical single-engine propeller airplane. Apply rudder as required to remain coordinated.

Trim Trimming Before the Climb Is Stable

Establish the desired attitude, power and airspeed first. Use trim only after the climb is stable to relieve steady control pressure.

Lookout Looking Inside Too Long

The nose-up attitude already reduces forward visibility. Keep the outside scan as your priority and use only brief instrument checks.

Level-Off Beginning the Level-Off Too Late

If you wait until the target altitude is already reached, the airplane will usually continue climbing above it. Begin the level-off slightly before the selected altitude.

Cockpit Takeaway

What to Remember Before You Fly

You should be able to mentally rehearse the complete maneuver before performing it with your instructor.

1
Clear the Area

Look outside and confirm the airspace is clear.

2
Establish Pitch and Power

Raise the nose smoothly and set the required climb power.

3
Maintain Coordination

Use rudder and aileron as required to keep the airplane straight and coordinated.

4
Control Airspeed with Pitch

Once climb power is established, use small pitch changes to maintain the desired climb airspeed.

5
Cross-Check

Confirm airspeed, heading, coordination, climb performance and engine indications.

6
Trim When Stable

Relieve steady elevator pressure only after the climb condition is established.

7
Begin the Level-Off Early

Start slightly before the selected altitude, level smoothly, accelerate, set cruise power and re-trim.

8
Keep Looking Outside

Maintain an active traffic scan throughout the maneuver.

The Goal

A Stable Climb, Not Constant Corrections

Once the correct pitch, power and airspeed are established, the airplane should require only small corrections. Build a stable outside sight picture, confirm it with brief instrument checks and avoid continually changing the controls.

Additional Training Resource

Airplane Maneuvers Mastery — Private Pilot

Continue reviewing private pilot airplane maneuvers with this additional training lesson from Pilot Institute.

Affiliate link — StudyFlight may earn a commission from qualifying purchases, at no additional cost to you.

View the Training Lesson →
Review

Review Questions

Before practicing climbs in the airplane, make sure you can explain the difference between pitch attitude and angle of attack, the purpose of each climb speed, the basic control sequence, how to correct airspeed and coordination, and how to transition back to straight-and-level flight.

1. What is the difference between pitch attitude and angle of attack?

Pitch attitude describes the airplane's orientation relative to the horizon. Angle of attack is the angle between the wing's chord line and the relative wind. A nose-up pitch attitude therefore does not, by itself, tell you the airplane's exact angle of attack.

2. What is the difference between Vy and Vx?

Vy is the best rate of climb speed: it provides the greatest altitude gain in a given amount of time. Vx is the best angle of climb speed: it provides the greatest altitude gain over a given horizontal distance.

3. Why might a normal climb be flown faster than Vy?

When maximum climb performance is not required, a normal climb can provide better forward visibility, improved engine cooling and more comfortable aircraft handling. Use the climb speed recommended for the specific airplane.

4. Once climb power is established, how do you correct an airspeed that is too low?

Lower the nose slightly, establish the new outside sight picture and give the airplane time to respond. As the target airspeed returns, stabilize the appropriate climb attitude and re-trim if necessary.

5. What should you do if the airplane is climbing faster than the target airspeed?

Raise the nose slightly with a small elevator input, hold the new attitude and allow the airplane to decelerate toward the target climb airspeed. Avoid repeatedly chasing the airspeed indicator.

6. Why is right rudder often required during a climb in a single-engine propeller airplane?

High power, lower airspeed and a nose-up attitude can strengthen the airplane's left-turning tendencies. Right rudder is therefore commonly required to maintain coordinated flight and the selected direction. The amount required depends on the airplane and conditions.

7. When should you begin leveling off from a climb?

Begin slightly before reaching the selected altitude. A useful starting point is approximately 10% of the current rate of climb below the target altitude. For example, at 500 fpm, begin the level-off approximately 50 feet early.

8. Why do you normally keep climb power temporarily during the level-off?

After establishing the level-flight attitude, retaining climb power temporarily allows the airplane to accelerate toward the desired cruise airspeed. Cruise power is then set and the airplane is re-trimmed.

9. Which conditions can reduce climb performance?

High density altitude, greater aircraft weight, additional drag from configuration and reduced available engine power can all decrease climb performance. Use the AFM/POH performance data for the airplane and current operating conditions.

Before the Flight

Can You Explain the Procedure From Memory?

Before getting into the airplane, you should be able to explain the difference between pitch attitude and angle of attack, establish a normal climb, maintain the target airspeed and coordination, distinguish normal climb from Vx and Vy, monitor climb performance and traffic, and level off smoothly at the selected altitude.

Tags:

error:
Study flight
Logo