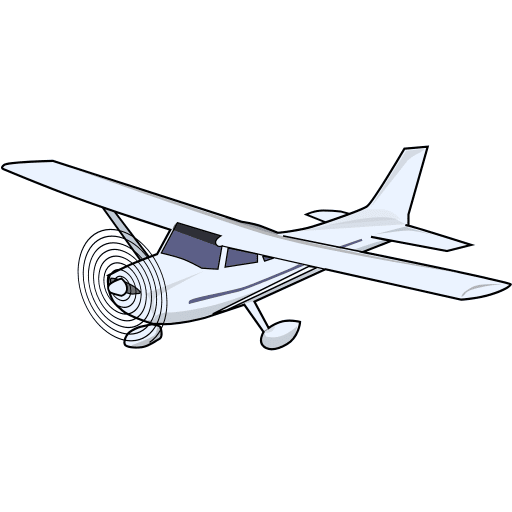

Straight-and-Level Flight by Reference to Instruments

Straight-and-level instrument flight lesson showing a cockpit instrument panel, attitude indicator, altimeter, heading indicator, and airspeed indicator.
Pre-Flight Lesson Instrument Flying

Straight-and-level flight by reference to instruments is one of the fundamental skills of instrument flying. It means maintaining a constant altitude and heading while controlling the airplane's attitude and airspeed without relying on the outside horizon.

Before learning this maneuver using instruments, make sure you understand the basic principles of straight-and-level flight. If you need a refresher, review our Straight-and-Level Flight lesson.

In this lesson, you will learn how to use the flight instruments to establish a stable attitude, maintain the desired flight path, and recognize small deviations before they become larger errors.

Lesson Objective

Learn to establish and maintain straight-and-level flight using pitch, bank, power, and trim. Use instrument indications to maintain altitude, heading, and airspeed, and make smooth corrections when necessary.

01 Establish

Set the appropriate pitch and bank attitude, choose the required power setting, and trim the airplane for stable flight.

02 Maintain

Use the flight instruments to confirm that altitude, heading, and airspeed remain at their desired values.

03 Correct

Recognize unwanted changes in the flight path, make small control adjustments, and verify that the airplane responds as intended.

Why This Skill Matters

When outside visual references are limited or unavailable, pilots must rely on their instruments to maintain precise aircraft control.

Straight-and-level flight is a foundation for more advanced instrument maneuvers, including climbs, descents, and turns. Learning to maintain a stable flight path also helps reduce unnecessary corrections and pilot workload.

Understanding the Flight Conditions

Straight Flight vs. Level Flight: What's the Difference?

Straight flight and level flight describe two different flight conditions.

Straight flight refers to maintaining a constant heading. Level flight refers to maintaining a constant altitude. An airplane can satisfy one condition without satisfying the other.

01

Straight Flight

An airplane is flying straight when it maintains a constant heading without turning.

In normal coordinated flight, the pilot keeps the wings approximately level to prevent an unwanted turn.

However, flying straight does not necessarily mean maintaining altitude. The airplane can climb or descend while maintaining the same heading.

Example: A Straight Climb
Heading 090° → 090°
Altitude 4,500 → 4,700 ft
Straight flight, but not level flight
Instrument Clue

The heading indicator helps you confirm that heading remains constant. The attitude indicator helps you recognize an unwanted bank.

02

Level Flight

An airplane is flying level when it maintains a constant altitude.

Level flight does not mean that the airplane's nose must point exactly at the horizon. The required pitch attitude depends on airspeed, configuration, and aircraft characteristics.

An airplane can also maintain altitude while turning. In this case, it is flying level, but not straight.

Example: A Level Turn
Altitude 5,000 → 5,000 ft
Heading 090° → 120°
Level flight, but not straight flight
Instrument Clue

The altimeter confirms whether altitude remains constant. The attitude indicator shows pitch attitude, while the vertical speed indicator provides supporting information.

Putting Both Together

In straight-and-level flight, the airplane maintains both a constant heading and a constant altitude.

When flying by instruments, you must confirm both conditions. A stable heading alone does not prove that the airplane is maintaining altitude. A stable altitude alone does not prove that the airplane is flying straight.

Reading the Flight Instruments

Flight Instruments Used for Straight-and-Level Flight

In straight-and-level flight by reference to instruments, each flight instrument has a specific role.

The attitude indicator shows the airplane's pitch and bank directly. Other instruments help you confirm whether the airplane is maintaining the desired heading, altitude, and airspeed.

Understanding what each instrument tells you is essential. A single indication does not always give you the complete picture of the airplane's flight condition.

AI

Attitude Indicator

The attitude indicator gives a direct indication of the airplane's pitch and bank attitude.

It is the primary visual reference for establishing the desired attitude. You can see whether the wings are approximately level and whether the nose is above or below the instrument's horizon reference.

Attitude indicator showing approximately wings-level flight with a nearly horizontal artificial horizon.
Wings Approximately Level
Attitude indicator showing a tilted artificial horizon, indicating that the airplane is banked.
Banked Attitude

Remember that a wings-level indication does not automatically mean the airplane is maintaining altitude. The pitch attitude required for level flight depends on airspeed, configuration, and aircraft characteristics.

What to Look For

A stable pitch attitude and approximately level wings. Confirm the actual flight performance using the other instruments.

HI

Heading Indicator

The heading indicator shows the airplane's heading and helps you recognize unwanted changes in direction.

During straight flight, the heading indication should remain constant. If it begins changing, the airplane may be turning even if the bank is difficult to notice.

Traditional heading indicator with a rotating compass card and a fixed heading reference at the top.
Read the airplane's heading at the fixed reference index on the instrument.

The heading indicator is also an indirect indication of bank: in normal flight, an unintended bank often produces a heading change.

A traditional heading indicator can drift over time. Compare it periodically with the magnetic compass under the appropriate steady-flight conditions.

What to Look For

A steady heading indication. Remember that the heading indicator does not directly measure the angle of bank.

ALT

Altimeter

The altimeter is the airplane's altitude indicator. It shows indicated altitude based on atmospheric pressure and the selected altimeter setting.

In level flight, the altitude indication should remain constant, apart from small variations caused by turbulence or other disturbances.

Traditional aircraft altimeter with three indicating hands and an adjustable barometric pressure setting.
Use the altimeter to confirm that the airplane is maintaining the desired indicated altitude.

The altimeter does not directly show pitch attitude. Instead, it confirms the result of your pitch and power control.

What to Look For

The desired altitude, with no continuing upward or downward trend. Always use the appropriate altimeter setting.

ASI

Airspeed Indicator

The airspeed indicator shows indicated airspeed, usually in knots.

During straight-and-level flight, it helps you determine whether the airplane is maintaining the desired airspeed.

Airspeed is closely related to pitch and power. If power or attitude changes, the airspeed may change as the airplane responds.

Airspeed Indicator

Shows the airplane's indicated airspeed. It helps confirm the performance produced by pitch and power.

Engine Instruments

Show information about the engine's operating condition and selected power, such as RPM or manifold pressure, when applicable.

The airspeed indicator is not an engine power gauge. The airplane's actual speed response also depends on its attitude, configuration, and flight conditions.

What to Look For

Airspeed remaining near the desired value, with no continuing acceleration or deceleration.

Supporting Instruments: Turn Coordinator and VSI

Two additional instruments help you recognize changes in the airplane's flight condition. They support your main instrument cross-check but do not replace the attitude indicator, heading indicator, or altimeter.

Turn Coordinator and Slip/Skid Indicator

The turn coordinator provides information about the direction and rate of turn. When the airplane is rolling into or out of a turn, it also responds to roll rate.

During straight flight, the turn indication should remain near its neutral position.

The slip/skid indicator, also called the inclinometer, is the ball at the bottom of the instrument. A centered ball indicates coordinated flight. A ball displaced from the center indicates a slip or skid.

Two traditional turn instrument diagrams showing uncoordinated flight: skid indication above and slip indication below, with the inclinometer ball displaced from center.
These illustrations compare skid and slip indications. Notice how the position of the ball changes.
Important: The turn coordinator does not directly display the airplane's bank angle. The ball indicates coordination, not whether the wings are level.

Vertical Speed Indicator (VSI)

The vertical speed indicator shows the airplane's rate of climb or descent, usually in feet per minute (fpm).

In stabilized level flight, the VSI should indicate approximately zero vertical speed.

An upward or downward indication can help you recognize a developing climb or descent. However, a conventional VSI may lag behind changes in vertical speed.

This is why you should not rely on the VSI alone to maintain altitude. Use the altimeter to confirm whether the desired altitude is being maintained.

Important: The VSI shows vertical speed, not pitch attitude. A zero indication alone does not confirm that the airplane is flying straight or that it is at the assigned altitude.
Understanding Primary and Supporting Instruments

In the traditional primary/supporting instrument method for straight-and-level flight, the altimeter is primary for pitch, the heading indicator is primary for bank, and the airspeed indicator is primary for power.

In this method, "primary" identifies the instrument used to confirm the desired flight performance for a particular control. The attitude indicator still gives the pilot a direct reference for pitch and bank.

Key Point

The attitude indicator shows the airplane's pitch and bank. The heading indicator, altimeter, and airspeed indicator confirm important parts of the airplane's actual performance.

Learning to connect these indications is the foundation of maintaining straight-and-level flight by reference to instruments.


Aircraft Control Technique

How to Establish and Maintain Straight-and-Level Flight

Once you understand the instruments, the next step is learning how to use the flight controls to maintain a stable flight condition.

In instrument flying, smooth control comes from combining pitch, bank, power, and trim. You establish the desired airplane attitude, then use the instrument indications to confirm the result.

The Four-Step Control Process

The FAA describes a four-step process for controlling aircraft attitude: establish, trim, cross-check, and adjust. These steps work together during straight-and-level flight.

01 Establish
Set the Attitude and Power

Use smooth flight control inputs to establish the approximate pitch and bank attitude needed for level flight.

✓ Use the elevator to establish the desired pitch attitude.
✓ Use the ailerons to maintain approximately level wings.
✓ Use the rudder as needed to maintain coordinated flight.
✓ Select an appropriate cruise power setting for the airplane and desired airspeed.

Remember: The exact pitch attitude and power setting depend on the aircraft, airspeed, and configuration. Use your aircraft's AFM/POH guidance.

02 Trim
Relieve Control Pressure

After establishing the desired attitude, adjust the trim to reduce the pressure needed to hold the flight controls in position.

✓ Maintain the desired attitude with the flight controls.
✓ Adjust the elevator trim gradually to relieve sustained control pressure.
✓ Continue monitoring the airplane's attitude while making trim adjustments.

As the airplane settles at its desired airspeed, you may need another small trim adjustment.

Remember: Trim reduces the effort required to hold an attitude. It does not replace normal control inputs.

03 Cross-Check
Confirm the Flight Performance

Once the attitude and power are established, compare the instrument indications with the desired flight condition.

✓ Altitude: Is the airplane maintaining the assigned altitude?
✓ Heading: Is the airplane maintaining the desired heading?
✓ Airspeed: Is the indicated airspeed stabilizing near the selected value?
✓ Vertical speed: Is the airplane maintaining approximately zero vertical speed?

Keep checking the attitude and relevant engine instruments as part of the normal cross-check.

Remember: Do not rely on one indication alone. Look for a consistent picture of stable flight.

04 Adjust
Refine and Maintain

If the instrument indications show that the airplane is not maintaining the desired condition, make a small, appropriate adjustment.

✓ Identify which flight parameter needs attention.
✓ Make a smooth control or power adjustment as appropriate.
✓ Allow the instruments to show the response before making another adjustment.
✓ Re-trim when needed and continue the cross-check.

Remember: Precise instrument flying usually requires small, controlled inputs, not repeated large movements of the controls.

A Common Mistake: Using Trim to Control the Airplane

Imagine that you need constant backward pressure on the control yoke to maintain the correct pitch attitude.

The correct technique is to hold the desired attitude with the elevator, then adjust the trim to relieve the pressure.

Do not use the trim wheel as your primary means of raising or lowering the airplane's nose. Trim is a control aid, not a substitute for flying the airplane.

Practical Example: Establishing Cruise After a Climb

Imagine you have just reached your assigned altitude. You now need to establish stable straight-and-level flight at the desired cruise airspeed.

What Happens During the Transition?
INITIAL LEVEL-OFF Establish the Cruise Attitude

Smoothly transition from the climb attitude toward the attitude required for level flight. Keep the wings level and maintain the desired heading.

Adjust power as appropriate for the aircraft and the desired cruise airspeed.

STABILIZED CRUISE Confirm and Re-Trim

As the airspeed settles, verify that altitude and heading remain steady.

Make any necessary small adjustments, relieve remaining control pressures with trim, and continue monitoring the instruments.

Key Point

Establish the desired attitude and power setting, trim to relieve control pressure, cross-check the performance, and make small adjustments as necessary.

A well-trimmed airplane reduces pilot workload, but it still requires an active instrument cross-check.

Instrument Flying Technique

Airspeed Changes: Pitch, Power and Instrument Cross-Check

When changing airspeed during straight-and-level instrument flight, the pilot must maintain the assigned altitude and heading while the airplane accelerates or decelerates.

The change in airspeed also requires a change in the pitch attitude needed for level flight. The flight instruments help you establish and verify that new attitude.

Why Does Pitch Change with Airspeed?

INCREASING AIRSPEED More Power, Higher Airspeed

Increasing power allows the airplane to accelerate. If the original pitch attitude is maintained, the airplane tends to climb as airspeed and lift increase.

Required Pitch Change

At a higher stabilized airspeed, less angle of attack is needed to maintain level flight. The airplane therefore requires a slightly lower pitch attitude.

The pilot monitors the altimeter and adjusts pitch to maintain altitude while the ASI shows an increasing airspeed.

DECREASING AIRSPEED Less Power, Lower Airspeed

Reducing power allows the airplane to slow down. If the original pitch attitude is maintained, the airplane tends to descend as lift decreases.

Required Pitch Change

At a lower stabilized airspeed, more angle of attack is needed to maintain level flight. The airplane therefore requires a slightly higher pitch attitude.

The pilot monitors the altimeter and adjusts pitch to maintain altitude while the ASI shows a decreasing airspeed.

These relationships apply to normal flight, at the same aircraft weight and configuration, within the usual unstalled operating range. The exact pitch change depends on the airplane and the selected airspeed.

Why Can Heading Change When Power Changes?

Power Changes Can Affect Yaw and Roll

In a single-engine propeller-driven airplane, changing power also changes the forces produced by the engine and propeller.

For example, the spiraling slipstream can create a yawing tendency, while propeller torque can create a rolling tendency. The effects depend on the aircraft and flight conditions.

If these tendencies are not corrected, the airplane's nose may move away from the desired heading, or the airplane may develop an unwanted bank and begin turning.

The heading indicator then shows the resulting heading change. The pilot uses appropriate rudder to control yaw and ailerons to maintain wings-level flight.

The heading indicator does not react directly to engine power. It shows an actual change in the airplane's heading.

How to Cross-Check the Instruments During an Airspeed Change

After adjusting power, briefly verify the setting using the tachometer or manifold pressure gauge, as applicable.

Then continue a frequent cross-check of the flight instruments. The airspeed is expected to change, but altitude and heading must remain constant.

Example of a Selected Instrument Scan
AI ALT AI HI AI ASI AI

Return frequently to the attitude indicator. Adapt the scan to the indications requiring attention.

AI Pitch and bank: confirm the new pitch attitude as airspeed changes, while keeping the wings level.
ALT Altitude: verify that the airplane maintains the assigned altitude throughout the speed change.
HI Heading: check for unwanted direction changes, particularly after adjusting power.
ASI Airspeed: follow the trend toward the desired new airspeed.

The turn coordinator and its inclinometer provide supporting information about turning and coordination. The VSI helps detect vertical movement, but a conventional VSI can respond with a delay.

Example: Reducing Airspeed While Maintaining Altitude and Heading

You are flying at 4,500 feet, heading 090°, at 110 KIAS. You reduce power to slow to 95 KIAS.

Compare the Instrument Indications
During Deceleration
ASI Decreasing toward 95 KIAS
AI Gradually higher pitch than at the original speed
ALT Holding 4,500 ft
HI Holding 090°
At the New Stable Airspeed
ASI Steady near 95 KIAS
AI Stable at the new pitch attitude
ALT Holding 4,500 ft
HI Holding 090°

As the airspeed approaches 95 KIAS, adjust power to maintain the new speed. Confirm altitude and heading, then re-trim as necessary.

Key Point

Changing airspeed in straight-and-level flight requires a new stabilized pitch attitude. Higher airspeed generally requires lower pitch; lower airspeed generally requires higher pitch.

During the transition, use the AI to monitor attitude, the ALT to maintain altitude, the HI to maintain heading, and the ASI to follow the speed change. Pay attention to coordination whenever engine power changes.

Instrument Interpretation

Recognizing and Correcting Flight Deviations

In straight-and-level instrument flight, small changes in altitude or heading can develop before the pilot notices any obvious movement of the airplane.

The important skill is to recognize which flight condition is changing and use the instrument indications together to determine the appropriate correction.

Look for a Consistent Trend

A single instrument indication does not always explain what is happening. Compare it with other relevant instruments.

For example, an altimeter showing decreasing altitude, a VSI indicating descent, and an attitude indicator showing a lower pitch than intended all support the same conclusion: the airplane is descending.

ALTITUDE DEVIATION

Detecting an Unintended Descent

You are assigned an altitude of 4,500 feet and are maintaining a heading of 090°.

During your instrument cross-check, you notice the following indications.

Instrument Indications
ALT
4,500 → 4,470 ft and still decreasing.
VSI
Approximately −250 fpm .
AI
Pitch attitude slightly lower than the established level-flight attitude.
HI
Steady at 090°.
What Do These Indications Mean?

The airplane is descending below its assigned altitude. The altimeter shows the altitude loss, the VSI confirms a negative vertical speed, and the attitude indicator helps identify the pitch change.

Correct and Verify

Make a controlled pitch correction to arrest the descent. Regain the assigned altitude smoothly, using appropriate power as needed.

As you return to 4,500 feet, establish the correct level-flight attitude and verify that the altimeter stops changing.

Continue checking airspeed and heading throughout the correction.

HEADING DEVIATION

Detecting an Unintended Turn

You are maintaining 4,500 feet on an assigned heading of 090°.

Your cross-check now shows the following indications.

Instrument Indications
HI
Heading 090° → 100° and still increasing.
AI
Slight right bank.
TC
Indicates a right turn.
ALT
Steady at 4,500 ft.
What Do These Indications Mean?

The airplane is turning right instead of maintaining its assigned heading. The heading indicator shows the change in direction, while the attitude indicator and turn coordinator support the diagnosis.

Correct and Verify

Level the wings to stop the unwanted right turn. Then make a gentle, coordinated left turn to return to 090°.

Roll out in time to avoid overshooting the heading. Confirm that the heading indicator is stable again.

Continue monitoring altitude during the entire correction.

When Airspeed Changes Unexpectedly

A planned airspeed change was covered in the previous chapter. Here, the problem is different: the airspeed changes even though the pilot is trying to maintain a constant speed.

Example: Airspeed Is Decreasing
ASI 105 → 95 KIAS
ALT 4,500 ft
HI 090°

The airplane is maintaining altitude and heading, but the airspeed is decreasing.

Check the engine power indications and confirm the aircraft configuration. A lower-than-intended power setting or increased drag may explain the airspeed loss.

Do not assume that every airspeed change has the same cause. Compare the indications, identify the problem, and make the appropriate correction while maintaining control of the flight path.

What If the Instruments Do Not Appear to Agree?

Sometimes an instrument indication may seem inconsistent with the others. Understanding instrument limitations helps prevent unnecessary corrections.

Altimeter and VSI

The conventional VSI does not always respond immediately to a vertical speed change.

If the altimeter shows a continuing altitude change, do not ignore it simply because the VSI still reads near zero.

Heading Indicator and Turn Coordinator

A traditional heading indicator can drift over time, even when the airplane is not turning.

If the heading indication changes slowly but the attitude indicator shows level wings and the turn coordinator shows no turn, consider possible instrument drift. Cross-check with the magnetic compass under suitable steady-flight conditions.

Key Point

When you notice an unwanted change in altitude, heading, or airspeed, compare the relevant instrument indications before deciding how to correct it.

Look for a consistent trend, identify the deviation, and verify that your correction brings the airplane back to the desired flight condition.

Instrument Flying Practice

Straight-and-Level Flight Practice and Review Questions

Understanding the instruments is only the first step. You must also be able to interpret their indications and decide whether the airplane is maintaining the desired flight condition.

The following exercises use a traditional flight instrument panel. Read each situation, compare the indications, and decide what they mean before revealing the answer.

Practice: Read the Instrument Picture

01
Practice Scenario An Unwanted Climb During Acceleration

You are maintaining 6,000 feet and heading 270°. You increase power to accelerate from 95 KIAS toward 110 KIAS.

Instrument Indications
ASI
102 KIAS , increasing.
ALT
6,000 → 6,020 ft , increasing.
VSI
Approximately +200 fpm .
AI
Slightly higher pitch than needed for the current level-flight condition.
HI
Steady at 270°.
Your Task

The airspeed is increasing as planned, but is the airplane still maintaining straight-and-level flight?

Which indications show the problem, and what should the pilot correct?

Show Explanation

The airplane is unintentionally climbing.

The increasing altimeter reading and positive VSI support this conclusion. The attitude indicator shows that the pitch remains too high for the current level-flight condition.

The pilot should adjust pitch smoothly to arrest the climb and return to the assigned altitude, while continuing to monitor airspeed and heading.

As the new airspeed is reached, establish the appropriate level-flight attitude and power setting, then re-trim as necessary.

02
Practice Scenario A Momentary VSI Indication

You are flying in light turbulence, maintaining 5,500 feet, heading 025°, at approximately 100 KIAS.

After a small bump, you notice the following instrument picture.

Instrument Indications
ALT
Near 5,500 ft, with no established continuing trend.
VSI
Momentarily indicates −200 fpm .
AI
Returns to the previously established level-flight attitude.
ASI
Approximately 100 KIAS.
HI
Steady at 025°.
Your Task

Does the momentary negative VSI indication prove that the airplane is in a continuing descent?

Should the pilot immediately make a large pitch correction?

Show Explanation

No continuing descent has been established from this snapshot alone.

The VSI may reflect a brief vertical movement caused by turbulence. Its indication can also lag behind changes in vertical speed.

The pilot should continue comparing the altimeter, attitude indicator, and VSI to determine whether a sustained altitude deviation is developing.

Avoid chasing a momentary VSI movement with large control inputs. Make an appropriate correction if a continuing altitude or flight-path deviation becomes evident.

03
Practice Scenario Straight and Level, but Not Coordinated

You are maintaining 6,800 feet on a heading of 320°. The airplane appears to be flying straight and level.

However, one instrument shows that something still needs attention.

Instrument Indications
ALT
Steady at 6,800 ft.
HI
Steady at 320°.
AI
Approximately wings level.
TC
No sustained turn indication.
BALL
Displaced to the left of center.
Your Task

If altitude and heading are stable, what is the problem?

Which control should the pilot use to improve the flight condition?

Show Explanation

The airplane is not in coordinated flight.

The off-center inclinometer ball shows uncoordinated flight even though the altitude and heading indications are stable.

The pilot should use appropriate rudder pressure in the direction of the displaced ball to bring it toward the center.

At the same time, maintain the desired attitude and heading with coordinated control inputs. Continue the instrument cross-check while making the correction.

Review Questions

Test your understanding of straight-and-level instrument flight. Try answering each question before opening the explanation.

01 What two flight conditions must remain constant during straight-and-level flight?

Altitude and heading. Maintaining only one does not establish straight-and-level flight.

02 Why is the attitude indicator not enough to confirm level flight?

The attitude indicator shows pitch and bank, not actual altitude. The altimeter confirms whether the airplane is maintaining the desired altitude.

03 In the traditional primary/supporting method, which instruments are primary for pitch, bank, and power in stabilized straight-and-level flight?

The altimeter is primary for pitch, the heading indicator for bank, and the airspeed indicator for power. The attitude indicator provides direct pitch and bank information.

04 Why is a higher pitch attitude generally needed when flying level at a lower airspeed?

In normal unstalled flight, at the same weight and configuration, a lower airspeed requires a higher angle of attack to produce the lift needed for level flight.

05 Why might the heading change after a power adjustment in a propeller-driven airplane?

A power change can alter propeller-related yaw and roll tendencies. Without suitable control inputs, the airplane may begin turning. The heading indicator then shows the resulting heading change.

06 During a planned airspeed change, which indications should change, and which should remain stable?

The ASI should move toward the new target airspeed. The ALT and HI should remain at the assigned altitude and heading. The AI helps monitor the required pitch adjustment.

07 What is the correct purpose of elevator trim during straight-and-level flight?

Elevator trim relieves sustained control pressure after the desired attitude has been established. It should not replace normal elevator control.

08 Does a VSI reading near zero prove that the airplane is at its assigned altitude?

No. A zero VSI indicates approximately zero vertical speed, not a particular altitude. Check the altimeter to confirm the altitude. Also remember that a conventional VSI can respond with a delay.

Training Note

When practicing instrument flying, avoid reacting to every small needle movement.

Compare the relevant instrument indications, recognize a developing trend, and make smooth, appropriate corrections. Your instructor will help you develop the timing and control coordination needed for precise flight.

Key Point

Precise straight-and-level instrument flight depends on understanding how the instrument indications work together.

Read the instruments, recognize the trend, make the appropriate correction, and verify the result.

error:
Study flight
Logo