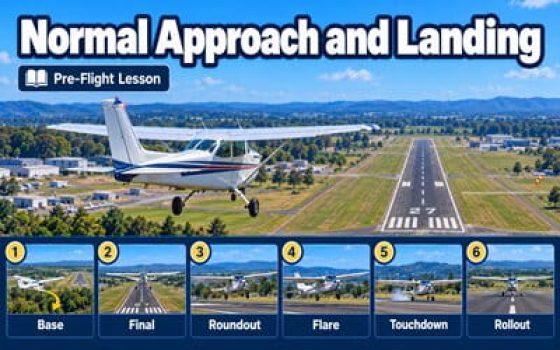

Normal Approach and Landing: Complete Pre-Flight Lesson

Normal approach and landing pre-flight lesson showing a light training airplane approaching a runway and the six landing phases: base, final, roundout, flare, touchdown, and rollout.
Pre-Flight Lesson Approach & Landings
Lesson Objective

A successful landing requires more than bringing an airplane onto the runway. It involves controlling airspeed, descent path, pitch attitude and aircraft configuration while making timely decisions throughout the approach and landing.

This pre-flight lesson explains the techniques used to perform a normal approach and landing in a light training airplane. You will learn how landing performance is affected by aircraft weight, wind, density altitude and runway conditions, and how to select the appropriate approach speed, flap configuration and aiming point.

The lesson then covers the stabilized final approach, roundout (flare), touchdown and landing roll. It also examines shallow and steep approaches, common landing errors, visual illusions and situations that require a go-around.

It builds on the Airport Traffic Pattern (Circuit) Pre-Flight Lesson , which covers pattern entries, traffic awareness and the sequence of the different pattern legs. Always use the aircraft's approved AFM/POH, performance charts and checklist for specific speeds, configurations and limitations.

Understand Landing Performance

Recognize how airspeed, aircraft weight, wind, runway slope and surface conditions affect landing distance and safety.

Practice Approach and Landing Control

Learn the techniques for maintaining a stabilized approach, performing the flare, touching down correctly and controlling the landing roll.

Decide When to Continue or Go Around

Recognize unstable approaches, visual illusions and landing errors, and understand when discontinuing the landing is the safer decision.

Why Study Normal Landings? A good landing begins long before touchdown.

Landing is one of the most demanding phases of flight because the airplane must transition from a controlled descent to ground contact while maintaining directional control and reducing speed. Small errors in airspeed, height or timing can become difficult to correct close to the runway.

For a student pilot, the goal is not simply to make a smooth touchdown. It is to develop a repeatable, controlled and safe landing technique: anticipate changes, recognize the correct visual references, manage the airplane's energy and make sound decisions throughout the maneuver.

Landing Fundamentals

What Is a Normal Approach and Landing?

A normal approach and landing is the standard procedure used to bring an airplane safely from its approach to touchdown and a controlled stop on a suitable runway. It is the foundation of basic landing training and provides the skills required before learning more specialized landing techniques.

Core Concept A normal landing assumes normal aircraft operation and suitable landing conditions.

Engine power is available, the wind is light or the approach is made directly into the wind, the final approach path is free of unusual obstacles, and the landing surface is firm and sufficiently long to bring the airplane to a stop. The pilot uses the aircraft's recommended normal landing procedure rather than a specialized short-field or soft-field technique.

Conditions for a Normal Landing

Aircraft Operation Engine Power Is Available

The engine is operating normally, allowing the pilot to adjust power during the approach. An approach following an engine failure requires different planning and procedures.

Wind Conditions Light Wind or an Approach Into the Wind

Normal landing instruction generally begins with light wind or a runway aligned with the wind. Significant crosswind conditions require specific drift-correction and directional-control techniques.

Runway Firm Surface and Adequate Length

The landing area provides a suitable surface and enough usable distance for the airplane to touch down and decelerate safely under the existing conditions. A short or soft runway may require a different landing technique.

Approach Path No Unusual Obstacle Restrictions

The approach can be flown along a suitable descent path without requiring an unusually steep approach to clear obstacles near the runway. Obstacle-limited approaches require additional planning.

Normal Landing vs. Specialized Landings

The term normal describes the operating situation and the appropriate landing technique. It does not mean that every airplane will use the same airspeed, flap setting or touchdown technique.

Normal Landing A Standard, Predictable Approach

The runway provides adequate stopping distance, and the aircraft can be landed using its recommended normal procedure. The emphasis is on a controlled, stabilized approach and a safe touchdown and rollout.

Specialized Landing Additional Performance or Surface Demands

Short-field landings prioritize precise touchdown placement and stopping performance. Soft-field landings require techniques that reduce the loads imposed on the landing gear by a soft or rough surface. Crosswind landings require additional drift and directional-control techniques.

Landing Area Where Should a Normal Landing Occur?

For a typical normal landing on a runway of adequate length, the planned touchdown area is beyond the approach threshold, normally within the first third of the runway. The precise touchdown location must be appropriate for the aircraft, runway markings and available landing distance.

The airplane should not be forced onto the runway merely to reach a selected spot. If an approach results in excessive floating or insufficient runway remaining for a safe stop, the pilot should discontinue the landing when it is still safe to do so.

Important A suitable runway does not automatically guarantee adequate landing performance.

The required landing distance can change significantly with aircraft weight, wind, density altitude, runway slope and surface condition. A runway that is adequate under one set of conditions may not provide sufficient margin under another. Landing performance must be assessed using the aircraft's approved data before committing to the landing.

Landing Performance

Factors Affecting Landing Distance and Performance

The distance an airplane needs to land is not always the same. Two landings on the same runway can require very different distances because of changes in aircraft weight, atmospheric conditions, wind, runway characteristics and landing technique. Understanding these factors is essential when deciding whether a landing can be completed safely.

Key Principle Landing performance depends on both touchdown speed and deceleration.

The airplane must first reach the runway at an appropriate speed and touchdown point. It must then lose enough speed to stop within the available landing distance. Anything that increases groundspeed, delays touchdown or reduces braking effectiveness can increase the runway distance required.

Ground Roll vs. Total Landing Distance

Before reading an aircraft performance chart, distinguish between the distance traveled after touchdown and the distance needed for the entire landing.

Ground Roll Touchdown to Full Stop

Landing ground roll is the distance the airplane travels along the runway after its wheels contact the surface until it comes to a complete stop.

Total Landing Distance Approach Reference to Full Stop

Total landing distance includes the airborne portion of the landing and the ground roll. Many light-airplane performance charts specify the distance required to clear a 50-foot obstacle and then come to a full stop.

Important: Check exactly what the aircraft's AFM/POH chart measures. Do not confuse ground roll with distance over a 50-foot obstacle, and do not assume that either figure includes an additional operational safety margin.

Eight Factors That Affect Landing Performance

1 Aircraft Landing Weight

A heavier airplane generally requires more lift to support its weight and has a higher stall speed. As a result, the recommended landing speed and touchdown speed may be higher.

Greater weight also means more energy must be dissipated during the landing roll. Landing distance normally increases as landing weight increases.

Pilot Consideration

Use the expected landing weight, not automatically the takeoff weight, when consulting performance data. Account for passengers, baggage and remaining fuel.

2 Density Altitude and Temperature

Air becomes less dense as pressure altitude increases or temperature rises. High density altitude is common at airports located at high elevations, especially on hot days.

At a given indicated airspeed, an airplane flies at a higher true airspeed in less-dense air. This generally means a higher groundspeed at touchdown for the same wind conditions, increasing the distance required to stop.

Pilot Consideration

Check airport elevation, temperature and pressure altitude. Use the appropriate AFM/POH performance corrections rather than relying only on indicated airspeed.

3 Wind Direction and Speed

A headwind reduces groundspeed for a given approach airspeed and generally reduces landing ground roll. A tailwind increases groundspeed and may increase landing distance substantially.

The actual headwind or tailwind component depends on the angle between the wind and the runway. Gusty conditions may require an approach-speed adjustment, which can also affect the landing distance.

Pilot Consideration

Use the wind component along the runway, not simply the reported wind speed. Follow the aircraft's wind and gust guidance. Avoid applying a fixed percentage per knot to every airplane.

4 Runway Slope

A runway with a downhill slope makes stopping more difficult because gravity acts in the direction of travel. It can increase the landing distance required.

An uphill slope generally assists deceleration, although wind, runway length and other operational factors may outweigh this advantage. Even a modest runway gradient can matter when stopping distance is limited.

Pilot Consideration

Verify runway gradient and available landing distance. Do not assume that landing downhill is acceptable simply because the runway is long or the wind is favorable.

5 Runway Surface Conditions

A dry, paved runway normally provides predictable tire grip and braking performance. Water, slush, snow and ice may significantly reduce braking effectiveness and directional control.

Grass presents different considerations. Its rolling resistance depends on the surface condition, while wet or slippery grass may greatly reduce the effectiveness of wheel brakes. Surface effects are not identical for every airplane.

Pilot Consideration

Check the actual runway condition and use manufacturer corrections when available. Never assume dry-pavement performance applies unchanged to a wet, icy or grass runway.

6 Flap Configuration

Extending flaps generally increases wing lift at a given airspeed and can permit slower landing speeds. Larger flap deflections also commonly increase drag.

Depending on the airplane, the recommended landing flap setting can help reduce touchdown speed and landing distance. However, different configurations produce different performance figures and limitations.

Pilot Consideration

Use the flap setting specified for the intended landing procedure and conditions. Check the applicable AFM/POH landing chart; do not assume every flap setting produces the same landing distance.

7 Wing Surface Condition

Contamination on the wing can disturb airflow and reduce aerodynamic performance. Frost, ice and snow are especially dangerous because even relatively small deposits can significantly reduce lift and increase drag.

Insects, dirt or other deposits may also degrade performance, particularly on airplanes with wings sensitive to surface contamination.

Pilot Consideration

Inspect lifting surfaces during preflight and follow the aircraft's contamination limitations. Do not assume the airplane's published performance remains valid when aerodynamic surfaces are contaminated.

8 Pilot Technique and Touchdown

Landing charts assume specified airplane configurations, approach conditions and landing techniques. Arriving faster than planned, crossing the threshold too high or floating far beyond the intended touchdown area can consume valuable runway.

After touchdown, braking technique and delays in deceleration also influence the actual stopping distance. Performance figures cannot compensate for an approach that is not properly controlled.

Pilot Consideration

Plan a stabilized approach and an appropriate touchdown area. Understand the assumptions behind published performance figures and maintain a realistic stopping margin.

Practical Comparison Why the Same Airplane May Need More Runway

Imagine two landings in the same training airplane, at the same indicated approach airspeed and landing weight. The difference is the environment.

Situation A Cool Day, Low Elevation, Dry Runway, Headwind

The denser air produces a lower true airspeed for the selected indicated airspeed. The headwind further reduces groundspeed, while the dry runway provides favorable braking conditions.

Situation B Hot Day, High Elevation, Wet Runway, Tailwind

The airplane travels faster over the ground at the same indicated airspeed. The tailwind increases touchdown groundspeed, and the wet surface may reduce braking effectiveness. The required landing distance may be much longer.

Lesson: The indicated approach speed alone cannot tell you how much runway is required. Landing performance must be evaluated for the actual aircraft and conditions.

How to Evaluate Landing Distance Using the AFM/POH

Performance Planning Four Checks Before Committing to a Landing

Use the landing performance information published for the specific airplane. Some aircraft provide charts, while others use tables or correction notes.

1
Identify the Conditions

Determine expected landing weight, pressure altitude, temperature, wind component and runway condition.

2
Select the Correct Performance Data

Use the chart or table for the intended flap configuration and landing procedure. Apply published corrections in the prescribed manner.

3
Compare the Correct Distances

Determine whether the result is ground roll or total landing distance. Compare it with the actual landing distance available on the runway.

4
Allow a Suitable Safety Margin

Account conservatively for operational conditions, pilot technique and uncertainty. If adequate distance cannot be assured, select another runway or airport.

Safety Multiple unfavorable conditions can combine to create a serious runway overrun risk.

A small tailwind, excessive approach speed and a wet runway may each appear manageable when considered separately. Together, they can require substantially more distance than a normal dry-runway landing.

Do not invent correction factors when the aircraft's performance data does not cover the conditions. Evaluate the uncertainty conservatively and choose a safer alternative when adequate stopping performance cannot be established.

Remember Heavier weight, higher density altitude, tailwind, downhill slope, reduced braking effectiveness and excessive touchdown speed generally increase the runway distance required. Always use the correct AFM/POH landing data, distinguish ground roll from total landing distance, and preserve an appropriate safety margin.
Airspeed & Aircraft Configuration

Landing Airspeed and Flap Configuration

Airspeed and flap configuration are closely connected during landing. The pilot must select a speed that provides an appropriate margin above the stall while allowing the airplane to approach and touch down in a controlled manner. Flaps can help establish the recommended landing configuration, but they must be operated within the airplane's published limits.

Key Principle Use the recommended approach speed for the selected landing configuration.

The correct final approach speed comes from the aircraft's AFM/POH and depends on the applicable landing procedure. Maintain the required margin above the stall, respect flap operating limits and avoid carrying unnecessary speed into the landing. A single speed or flap setting does not apply to every airplane.

Understanding the Important Airspeeds

VSO Stall Speed in Landing Configuration

VSO is the stalling speed or minimum steady flight speed in the specified landing configuration. For many training airplanes, this corresponds to landing gear down and full landing flaps.

It is an important reference when discussing final approach speeds and stall margins. However, it is not itself the speed at which a normal final approach should be flown.

VS1 Stall Speed in a Specified Configuration

VS1 refers to the stalling speed or minimum steady flight speed in a specified configuration. The lower limit of the green arc on a conventional airspeed indicator generally corresponds to the specified clean configuration at maximum weight.

Do not confuse VS1 with VSO when using a reference based on the landing configuration.

VFE Maximum Flap-Extended Speed

VFE is the maximum permitted airspeed with flaps extended to the applicable position. Extending or operating flaps above their permitted speed can damage the flap system or the airplane.

Some aircraft have different limits for partial and full flap extension. Always check the aircraft-specific limitations.

Final Recommended Final Approach Speed

The normal final approach speed is the speed recommended by the aircraft manufacturer for the applicable landing configuration and conditions. Some airplanes provide a specified speed, while others publish an acceptable range.

Select the appropriate value from the AFM/POH and use the correct cockpit airspeed indication. Do not substitute the stall speed or VFE for the recommended approach speed.

Why 1.3 VSO Is a Reference, Not a Universal Speed

Traditional Training Reference 1.3 × VSO

A commonly taught relationship between final approach speed and stall speed in landing configuration.

What does this relationship mean?

Flying at approximately 1.3 times the applicable landing-configuration stall speed has long been used as a reference in pilot training. It illustrates why an airplane should approach with an appropriate margin above the stall.

It is not a substitute for the AFM/POH. The manufacturer's speed may differ because of aircraft design, weight, configuration or operating conditions.

Also check whether published reference speeds are expressed in KIAS or KCAS. Calibrated and indicated airspeeds are not always identical, particularly at lower speeds.

How to Select the Correct Approach Speed

Before beginning the landing approach, determine the recommended speed for the specific airplane and the landing being performed. Three checks are especially important.

1 Check the AFM/POH

Identify the normal approach or landing speed published for the airplane. Confirm whether the value applies to a particular flap setting, aircraft weight or landing procedure.

2 Account for Conditions

Consider gusty winds and any other condition requiring a manufacturer-approved speed adjustment. Use the applicable AFM/POH guidance rather than adding an arbitrary amount of extra speed.

3 Confirm the Intended Configuration

Verify that the selected approach speed matches the intended flap setting and landing procedure. Check all relevant airspeed and configuration limitations before changing the airplane's configuration.

Gusty Conditions Why shouldn't you simply add extra speed?

Gusty conditions may justify a speed increment to provide a suitable margin against sudden airspeed changes. The appropriate increment depends on the airplane and the guidance provided by its manufacturer.

Excessive extra speed can make the airplane float longer during landing and may increase the distance needed to stop. The goal is not to approach as fast as possible, but to maintain the correct speed for the actual conditions.

Flap Settings and Airspeed Limitations

Flaps change the wing's aerodynamic characteristics. Their operation must be planned with airspeed in mind, especially during the transition from a clean configuration to the final landing configuration.

Configuration Guide Understand the Limits Before Extending Flaps

The exact flap positions and permitted speeds are airplane-specific. The following distinctions explain how configuration changes affect flap limitations.

Clean Configuration Flaps Retracted

The airplane is flown with its flaps retracted. Before selecting the first flap setting, reduce airspeed to the applicable extension limit.

Intermediate Configuration Partial Flaps

Some airplanes permit limited flap extension at a higher speed than full extension. These separate limits, when applicable, are published in the AFM/POH.

Landing Configuration Recommended Landing Flaps

Select the flap setting required for the landing only within its permitted speed range. The normal landing setting may be full flaps or another configuration specified by the manufacturer.

Airspeed Indicator What Does the White Arc Mean?

On a conventional light-airplane airspeed indicator, the white arc represents the flap operating range. Its lower end corresponds to VSO under the applicable reference conditions, and its upper end indicates the marked flap speed limit.

However, the white arc alone may not show every permitted partial-flap speed. Some aircraft allow certain partial flap settings above the white arc's upper limit. These exceptions must be confirmed in the aircraft's published limitations.

Never assume that every flap position has the same maximum speed.

What Happens When Flaps Are Extended or Retracted?

Flap Extension Changes in Lift, Drag and Pitch

Extending flaps changes the wing's lift and drag characteristics. Depending on the airplane and flap setting, the nose may pitch up or down as the configuration changes.

Maintain aircraft control, anticipate the change in control pressures and adjust pitch, power and trim as necessary. Allow the airplane to stabilize after a configuration change.

Flap Retraction Avoid Abrupt Loss of Lift

Retracting flaps changes lift, drag and the airplane's pitch characteristics. At low airspeed, removing too much flap too quickly can cause the airplane to settle or lose altitude.

Follow the AFM/POH retraction sequence, especially during a go-around. Never retract the flaps abruptly merely to correct an approach that has become too slow.

Before Landing Four Items to Know Before Final Approach

The pilot should know the intended speeds and configuration before the workload increases during the final approach.

Airspeed Recommended Final Speed

Know the speed or range specified for the intended normal landing.

Flap Limitations Applicable VFE

Identify the maximum permitted speed for each flap setting you expect to use.

Configuration Intended Landing Flaps

Know the manufacturer- recommended flap setting for the runway and operating conditions.

Aircraft Response Pitch, Power and Trim

Anticipate configuration changes and be prepared to maintain the desired flight condition.

Safety Avoid both excessive approach speed and an inadequate stall margin.

Flying too slowly can leave little margin above the stall, especially during turns, gusts or unexpected changes in flight conditions. Flying too fast can produce excessive floating and complicate a normal landing.

If the airplane is not at an appropriate speed or cannot be configured safely for landing, correct the condition while sufficient time and altitude remain. If a stabilized approach cannot be established, go around.

Remember VSO is a stall-speed reference, not a final approach target. Use the AFM/POH to select the correct landing speed and configuration. Respect the VFE limit for each flap setting, anticipate pitch changes and avoid unnecessary speed. A safe landing begins with an appropriate airspeed and a properly configured airplane.
Visual Approach Fundamentals

Aiming Point, Glidepath and Visual References

During a visual landing approach, the pilot uses the runway environment to judge where the airplane is going. Three closely related concepts help make these judgments: the aiming point, the glidepath and the visual movement of runway references. Together, they help the pilot recognize whether the airplane is approaching the intended landing area.

Core Concept What Is the Aiming Point?

The aiming point is the location on the ground where the airplane's present flight path would intersect the runway if that path continued without a landing flare. On a stable, constant-angle approach, the aiming point appears approximately stationary in the pilot's forward view while the surrounding runway environment expands as the airplane gets closer.

Aiming Point vs. Touchdown Point

The aiming point and the actual touchdown point are not normally the same location. During the roundout and flare, the pilot gradually reduces the airplane's descent rate before touchdown. This causes the airplane to travel farther along the runway than the location where the original descent path would have intersected the ground.

Visualizing the Aiming Point and Touchdown
Flare begins Aiming point Touchdown Actual flight path Projected path without flare Runway
The dashed line represents the projected approach path without a flare. The solid line represents the airplane rounding out and touching down farther along the runway. Not to scale.

How to Recognize the Aiming Point in the Windshield

As the airplane approaches the runway, the pilot observes the selected aiming area relative to the outside horizon and other fixed visual references. With a reasonably stable aircraft attitude, the apparent movement of that area provides useful information about the current flight path.

↔
Stationary Reference Aiming Point Stays in the Same Position

If the selected aiming point remains approximately stationary in the pilot's forward view, the projected flight path is converging toward that location. The runway becomes progressively larger, but the reference does not noticeably move up or down.

↑
Reference Moves Up Projected Path Falls Short

If the selected aiming point appears to move upward toward the horizon, the current flight path tends to intersect the ground before the intended aiming point. The airplane is trending toward an undershoot of that reference.

↓
Reference Moves Down Projected Path Extends Beyond

If the selected aiming point moves downward, farther below the horizon, the projected path tends to intersect the runway beyond that reference. The airplane is trending toward an overshoot of the intended aiming point.

Important Distinction These visual cues describe the projected flight path, not an automatic control input.

Pitch changes, turbulence, aircraft movement and changing visibility can affect the appearance of runway references. Use these cues together with the aircraft's flight instruments, airspeed, configuration and other available approach guidance. Do not make abrupt pitch changes merely to keep a runway marking at a fixed position in the windshield.

Understanding the Glidepath

The glidepath is the descent path followed by the airplane toward the runway. For a normal visual approach, the pilot aims to maintain an appropriate and reasonably constant descent angle that provides safe clearance over obstacles and allows the airplane to reach the intended landing area.

Many airports use visual approach guidance near 3 degrees, but this is not a universal descent angle. Terrain, obstructions, airport design and published procedures may require a different glidepath. Use the guidance applicable to the specific runway.

Visual References That Help Judge the Approach

Runway Perspective Runway Edges and Centerline

The runway edges appear to converge toward the far end of the runway, while the runway image expands as the airplane approaches. The extended centerline and runway alignment provide important lateral-position references.

Runway Markings Threshold and Aiming Point Markings

Threshold markings identify the approach end of the usable landing surface. Runway aiming point markings, where provided, offer a useful visual reference. The selected aiming area must be appropriate for the runway and planned landing.

Visual Glidepath Guidance PAPI and VASI Systems

Some runways are equipped with a Precision Approach Path Indicator (PAPI) or a Visual Approach Slope Indicator (VASI). These lighting systems provide visual information about the airplane's position relative to a defined approach path.

A common four-light PAPI normally shows two white and two red lights when the airplane is on the indicated glidepath. Increasing numbers of white lights indicate a position above the path, while increasing numbers of red lights indicate a position below it.

Two white, two red: an on-glidepath indication for a conventional four-light PAPI.

PAPI and VASI systems supplement the pilot's visual assessment. Their indications and limitations must be understood for the specific installation. Published obstacle-clearance protection is limited to the applicable system's designated area.

Safety Do not rely on runway perspective alone when judging approach height.

Runway width, slope, surrounding terrain and visibility conditions can distort the pilot's impression of height and distance. Cross-check visual cues against available approach guidance and instruments. The specific illusions created by runway width and slope will be examined later in this lesson.

Remember On a stable visual approach, the aiming point appears approximately stationary. If the selected reference moves up toward the horizon, the projected path is short; if it moves down, the projected path is long. The flare normally carries the airplane beyond the aiming point before touchdown. Always cross-check runway references with appropriate glidepath guidance.
Approach Path Corrections

Shallow and Steep Landing Approaches

A normal landing requires the airplane to follow an appropriate descent path toward the runway. An approach that becomes too shallow or too steep can create problems with obstacle clearance, airspeed, descent rate and touchdown location. The pilot must recognize a developing deviation early and determine whether a safe, stabilized approach can still be established.

Core Concept Approach angle and position relative to the glidepath are related, but not identical.

A shallow approach has a relatively small descent angle, while a steep approach has a larger descent angle. Separately, an airplane may be below or above the intended glidepath. An airplane below the path may be approaching short of the landing area; an airplane above it may require an excessively steep descent to reach the planned aiming point. These deviations should be evaluated together rather than treated as interchangeable conditions.

Comparing Shallow, Normal and Steep Approaches

Three Descent Angles Toward the Same Aiming Area
Aiming area Steep approach Normal approach Shallow approach Runway Side view - not to scale
Simplified illustration of different descent angles converging toward the same aiming area. The correct path depends on the runway, obstacles and applicable approach guidance. The drawing does not represent a universal approach angle.

Recognizing a Low or Shallow Approach

Recognition Below the Intended Glidepath

An airplane below the intended glidepath has less vertical clearance than planned. If the existing flight path continues, it may intersect the ground before the intended landing area.

The pilot may also notice that the approach requires increasing power to avoid losing additional height. An excessively shallow descent can reduce the margin over obstacles near the approach end.

Recognition Above the Intended Glidepath

An airplane above the desired glidepath has more altitude than planned for its remaining distance to the aiming area.

Reaching the planned landing area may require an increasingly steep descent. If the pilot continues without correcting the approach, the airplane may remain high, float beyond the intended touchdown area or require an excessive descent rate.

Correcting a Low or Shallow Approach

If the airplane is below the planned glidepath and there is still sufficient altitude and distance to recover safely, the objective is to intercept the intended path while maintaining an appropriate approach airspeed. The correction should be gradual and coordinated.

Low Approach Correction Recover the Glidepath Without Stretching the Glide
1
Recognize the Deviation

Identify that the airplane is below the desired path or tending to undershoot the intended landing area. Check airspeed and available obstacle clearance.

2
Coordinate Power and Pitch

Add power and adjust pitch attitude together, as appropriate, to reduce the descent or temporarily arrest it while maintaining the recommended airspeed.

3
Intercept the Intended Path

Allow the airplane to regain the planned glidepath without allowing airspeed to decay. Avoid continuing a prolonged low, high-power approach.

4
Reestablish a Normal Descent

Once the appropriate glidepath is regained, adjust power and pitch as necessary to maintain the intended descent. If a stable approach cannot be established, go around.

Important: Do not attempt to extend the airplane's glide by simply pulling back on the elevator. Without sufficient power, the resulting reduction in airspeed may increase the sink rate and reduce the stall margin.

Correcting a High or Steep Approach

When the airplane is above the desired glidepath, the pilot must assess whether the excess altitude can be corrected without excessive airspeed, descent rate or late maneuvering. A small deviation may be corrected early; a large deviation close to the runway generally calls for a go-around.

High Approach Correction Restore the Planned Descent Without Diving
1
Evaluate the Excess Height

Determine whether the airplane is only slightly above the desired glidepath or whether a large correction would be necessary.

2
Coordinate Power and Pitch

When appropriate, reduce power and adjust pitch to establish a steeper descent while maintaining the recommended approach airspeed.

3
Use Only Approved Configuration Changes

If additional drag is needed and the airplane permits it, an appropriate flap configuration may assist the correction. Observe all published speed and configuration limitations.

4
Assess the Result Early

Confirm that the airplane can return to a stable descent without excessive speed or descent rate. Discontinue the landing if a safe correction is no longer practical.

Important: Lowering the nose alone may cause an unwanted increase in airspeed. Likewise, an excessively steep descent close to the runway leaves little time to reduce the descent rate before landing.

Dangerous Corrections to Avoid

Low Approach Error Stretching the Glide With Elevator Alone

Raising the nose without enough power does not create the energy needed to reach the runway. It may instead reduce airspeed, increase induced drag and cause the airplane to sink more rapidly. At low altitude, the resulting loss of stall margin is particularly dangerous.

Low Approach Error Retracting Flaps to Reach the Runway

Retracting flaps in an attempt to correct a low approach may cause an abrupt reduction in lift and aggravate the descent. It is not a substitute for a proper glidepath correction or a go-around.

High Approach Error Diving Toward the Runway

An aggressive nose-down correction can create excessive airspeed and a high descent rate. The airplane may reach the runway too fast or require a late, abrupt flare.

High Approach Error Forcing the Landing From an Unstable Approach

Continuing an approach that remains too high, too fast or excessively steep may result in a long landing, a hard touchdown or insufficient runway remaining to stop safely.

Go-Around Decision When Is It Better to Discontinue the Approach?

The pilot should go around whenever the airplane cannot be brought onto a safe, stabilized approach with normal corrections. This includes situations where the airplane remains significantly high or low, requires excessive descent rates or has insufficient altitude to regain an appropriate flight path.

If the approach becomes unstable on short final, do not attempt to salvage the landing with large or abrupt corrections. Follow the stabilization criteria established by your instructor or operator, and initiate a go-around whenever a safe, stabilized approach can no longer be maintained.

Remember: there is no requirement to salvage an approach simply because the runway is in sight. An early, controlled go-around is preferable to forcing an unsafe landing.

Remember A low approach may require coordinated additional power and pitch to regain the intended glidepath while maintaining airspeed. A high approach may permit a coordinated reduction in power and adjustment in pitch, provided the airplane can return to a stable descent. Never stretch a glide by pulling back alone, never dive to force a landing, and go around whenever a safe correction is no longer practical.
Flight Procedure

Normal Approach and Landing: Step-by-Step Procedure

A normal approach and landing is a continuous sequence of coordinated maneuvers, beginning on the base leg and ending after the airplane has safely cleared the runway. Each phase requires control of airspeed, pitch attitude, power, descent path and directional alignment. The objective is to establish a stabilized approach, perform a controlled flare, touch down on the main wheels and maintain control throughout the landing roll.

Before You Begin

This procedure describes a typical light training airplane equipped with tricycle landing gear. In the traffic pattern used in this course, maintain traffic pattern altitude throughout downwind and initiate the planned descent on base. Complete the appropriate before-landing checks before workload increases. Use the aircraft's AFM/POH for actual speeds, flap settings, limitations and checklist procedures.

Traffic Pattern Connection How Does the Landing Fit into the Airport Traffic Pattern?

When arriving at an airport, you must first know how to safely enter and join the traffic pattern. Review the appropriate pattern entry procedures, traffic awareness, and positioning before joining the downwind, base, and final legs for landing.

Review the Circuit Lesson

1 Base Leg — Establish the Descent

The base leg positions the airplane for the turn onto final approach. Its location must account for runway distance, pattern altitude, wind and aircraft configuration. Good judgment on base is essential because an incorrectly positioned airplane may require large corrections close to the ground.

  1. Turn from Downwind to Base

    Begin the turn at a suitable position relative to the runway. On a conventional rectangular pattern, seeing the intended landing area approximately 45 degrees behind the wing is a commonly used visual cue, but the turn point must account for wind and traffic conditions. Make a coordinated turn and establish the intended base-leg ground track.

  2. Reduce Power and Begin the Descent

    Once established on base, reduce engine power and adjust pitch to enter a controlled descent. Select the recommended base-leg speed from the aircraft's AFM/POH or the training procedure established with your instructor. Coordinate pitch and power to maintain the desired descent without allowing airspeed to decay.

  3. Configure the Airplane

    Select the appropriate intermediate flap setting when recommended and permitted by airspeed limitations. Confirm landing gear position when applicable. Check the intended landing configuration and complete the necessary checklist items.

  4. Correct for Wind Drift

    Establish a wind-correction heading to maintain the planned base-leg track. Account for the influence of wind on both the distance to the runway and the timing of the turn onto final.

  5. Monitor Airspeed and Descent Rate

    Maintain coordinated flight, avoid unnecessary speed variations and trim the airplane as appropriate. Judge the runway's position and ensure sufficient distance remains to establish a stabilized final approach.

Before Turning Final

Appropriate airspeed, controlled descent, correct configuration and enough room to intercept the extended runway centerline.

2 Base-to-Final Turn — Align with the Runway

The turn from base to final is particularly important because the airplane is descending relatively close to the ground. The goal is to intercept the extended runway centerline with a coordinated turn, without sacrificing airspeed or obstacle clearance.

  1. Clear the Final Approach Area

    Look for traffic approaching or already established on final. Confirm the correct runway and consider the influence of wind on the upcoming turn.

  2. Initiate a Coordinated Turn

    Apply aileron and coordinated rudder to establish an appropriate bank angle. Maintain the required airspeed and monitor the descent. Avoid unnecessarily steep banking close to the ground.

  3. Anticipate the Rollout

    Watch the runway centerline approaching in the windshield. Begin rolling out in time to intercept the intended final approach track. A crosswind may affect the ground track and timing.

  4. Establish the Final Approach Track

    Roll the wings toward level as the airplane intercepts final. Make the appropriate wind correction and stabilize the airplane on the intended path.

Critical Safety — Avoid a Skidding Turn

If the airplane overshoots the extended runway centerline, never force the turn with excessive inside rudder and increased bank. The resulting skid can lead to an accelerated stall and spin. Go around when safe alignment cannot be achieved.

3 Final Approach — Stabilize the Airplane

Once established on final, the airplane should follow a predictable descent path toward the selected landing area. Coordinate pitch and power to maintain the recommended approach airspeed and glidepath while keeping the airplane aligned with the runway.

  1. Set the Recommended Final Approach Speed

    Adjust pitch and power to establish the speed specified in the AFM/POH for the intended landing configuration. Avoid excess speed, which can increase floating during the landing.

  2. Complete the Landing Configuration

    Select the final flap setting when appropriate, respecting VFE and all other limitations. Verify the airplane's landing configuration and complete the required checklist items.

  3. Maintain the Glidepath

    Use the runway aiming area, outside references and available glidepath guidance. Coordinate power and pitch adjustments to maintain the intended descent without unwanted airspeed changes.

  4. Maintain Runway Alignment

    Track the extended runway centerline while correcting for wind. Keep the airplane coordinated and avoid large heading changes or excessive maneuvering.

  5. Trim and Monitor

    Relieve control pressures as appropriate. Monitor airspeed, descent rate, runway position and any required landing clearance. Make only small corrections once the approach is stabilized.

Stabilized Approach Check

Correct runway and clearance, suitable airspeed, landing configuration established, appropriate glidepath, runway alignment maintained and only minor corrections required. Follow the applicable stabilization criteria.

4 Short Final — Prepare for the Landing

As the airplane approaches the runway threshold, time for corrections becomes increasingly limited. Maintain a stable descent, confirm the landing area and prepare for the roundout and flare.

  1. Continue Toward the Aiming Area

    Maintain the intended flight path and recommended approach speed. Observe the runway's expanding perspective and remain aware of the distance to the selected landing area.

  2. Maintain Alignment and Drift Correction

    Keep the airplane tracking the runway centerline. Correct for wind and prepare to eliminate sideways drift before touchdown.

  3. Confirm the Landing Can Be Completed Safely

    Check that the runway remains clear, the intended touchdown area is suitable and sufficient runway remains to stop. Discontinue an unstable or unsafe approach rather than trying to salvage it.

  4. Prepare to Transition from Descent to Flare

    Judge height from runway perspective and prepare for a smooth reduction in descent rate. Maintain positive control of pitch, power and runway alignment.

Approach flight path, aiming point, flare and touchdown point farther along the runway
Aiming Point and Touchdown. The projected path intersects the aiming point. The actual flight path curves during the flare, resulting in touchdown farther along the runway.
Before the Flare

Airspeed controlled, runway alignment maintained, descent stable and a suitable touchdown area still achievable. If not, go around.

5 Roundout and Flare — Reduce the Descent Rate

The roundout is the transition from the final approach descent toward a nearly level flight path just above the runway. The flare continues this transition, establishing the landing attitude and allowing the airplane to settle at a reduced descent rate.

  1. Recognize the Appropriate Flare Height

    As the airplane approaches the runway, its visual perspective changes rapidly. Judge height using runway references and peripheral vision. The correct initiation point depends on the airplane, landing attitude and approach conditions. Avoid relying on a universal height.

  2. Shift Your Vision Farther Down the Runway

    Gradually direct your visual focus farther ahead, rather than staring immediately over the nose. Use the runway's perspective to judge height and descent rate.

  3. Reduce Power as Appropriate

    Coordinate the power reduction with the changing flight path. In many light trainers, power is progressively reduced toward idle during the roundout, following the recommended landing technique.

  4. Apply Smooth Back-Elevator Pressure

    Gradually raise the nose to reduce the descent rate. Avoid an abrupt pull on the elevator. The objective is to reduce the descent smoothly, not to climb away from the runway.

  5. Maintain the Landing Attitude

    As airspeed decreases, continue adjusting back-elevator pressure to maintain the appropriate pitch attitude. Allow the airplane to settle progressively while maintaining runway alignment.

Illustrated sequence of the roundout and flare in a light airplane
Roundout and Flare Sequence. The illustration shows the progressive reduction in descent rate. The depicted heights are illustrative, not universal flare initiation points.
Do Not Force the Touchdown

Flaring too early can cause ballooning or loss of airspeed while too high; flaring too late may result in a hard landing. Avoid abrupt elevator movements. Go around if the landing becomes unsafe.

6 Touchdown — Main Wheels First

During a normal landing in a tricycle-gear airplane, the main landing gear should contact the runway before the nosewheel. Touch down with the appropriate attitude, runway alignment and minimal sideways drift.

  1. Allow the Airplane to Settle

    As airspeed decreases during the flare, progressively adjust elevator pressure to maintain the landing attitude. Allow the airplane to settle onto its main wheels.

  2. Keep the Longitudinal Axis Aligned

    Use rudder to maintain runway alignment and appropriate aileron to prevent unwanted roll and drift. Avoid touching down with significant sideways movement.

  3. Touch Down on the Main Landing Gear

    Maintain the correct pitch attitude as the main wheels contact the runway. Do not force touchdown with forward elevator pressure.

  4. Lower the Nosewheel Smoothly

    After the main gear is firmly on the runway, maintain control as the nosewheel lowers naturally. Avoid abruptly pushing the nose toward the surface.

Correct Touchdown

Main gear first, no significant sideways drift, longitudinal axis aligned with the ground track and nosewheel lowered smoothly.

What If the Airplane Bounces?

An improper touchdown attitude or excessive descent rate can cause a bounce. Particularly dangerous is porpoising, in which pitch and wheel contact oscillate repeatedly and may overload the nose gear.

Diagram illustrating repeated pitch changes during a porpoising landing
Porpoising During Landing. Repeated pitch changes and runway contacts can become increasingly unstable.
Safety — Bounce and Porpoising

A minor bounce may be recoverable using the airplane's recommended technique, provided control and adequate runway remain. A severe bounce, repeated bouncing, porpoising or uncertain landing attitude calls for a go-around when safe to perform. Never chase the runway with abrupt elevator inputs.

7 Landing Roll — Maintain Directional Control

Touchdown does not mark the end of the landing. Maintain positive control as the airplane decelerates, using rudder, ailerons, elevator, steering and brakes as appropriate.

  1. Maintain the Runway Centerline

    Look ahead along the runway and use rudder and appropriate steering to keep a straight ground track.

  2. Continue Using the Flight Controls

    Maintain elevator and aileron inputs appropriate to the airplane's speed and wind. Do not release the controls merely because the airplane is on the ground.

  3. Apply Braking as Appropriate

    Once firmly established on the runway, use the airplane's recommended braking technique. Apply braking smoothly while maintaining directional control and avoiding wheel lockup.

  4. Reduce to a Safe Taxi Speed

    Continue decelerating and maintaining runway alignment. Do not turn off onto a taxiway at excessive speed.

Maintain Control Throughout the Rollout

Premature steering, excessive braking or loss of directional control can cause a runway excursion. Continue controlling the airplane until it has slowed to a safe taxi speed.

8 Runway Exit — Complete the Landing

The landing is complete only after the airplane has safely exited the runway and the appropriate after-landing checks have been performed.

  1. Select an Appropriate Taxiway Exit

    Reduce speed sufficiently before turning. Follow applicable ATC instructions and verify the exit is suitable.

  2. Clear the Runway Completely

    Taxi beyond the runway holding-position marking until the entire airplane is clear of the runway-protected area.

  3. Follow the Applicable Taxi Instructions

    Contact ground control when instructed, verify the taxi route and remain aware of runway crossings.

  4. Complete the After-Landing Checklist

    Once fully clear of the runway and safely positioned, perform the checklist and configure systems according to the aircraft procedure.

Landing Complete

Airplane under control, runway fully vacated, taxi instructions understood and after-landing checks complete.

! Go-Around — Discontinue an Unsafe Landing

A go-around is a normal safety maneuver when an approach or landing attempt cannot be completed safely. Reasons include an unstable approach, unsafe alignment, an obstructed runway, excessive speed or a serious bounce.

  1. Make the Decision Promptly

    Initiate the go-around when a safe landing cannot be assured. Avoid delaying simply because the runway is close.

  2. Apply the Prescribed Go-Around Power

    Apply power as specified by the AFM/POH, maintain directional control and anticipate changes in pitch and control pressure.

  3. Establish the Appropriate Climb Attitude

    Adjust pitch to arrest the descent and establish a safe climb without excessive nose-up attitude or loss of airspeed.

  4. Reconfigure in the Correct Sequence

    Retract flaps and landing gear when applicable, according to the published procedure. Avoid abrupt full-flap retraction at low airspeed.

  5. Continue Climbing and Rejoin as Directed

    Maintain obstacle clearance, follow applicable traffic pattern or ATC instructions and prepare for another approach or an alternative plan.

Go-around illustration showing transition from approach to a positive climb
Go-Around Sequence. The illustration shows the transition from a discontinued landing to a climb. The actual speeds, configurations and sequence must follow the aircraft's AFM/POH.
Never Force an Unsafe Landing

Discontinue an approach while adequate control and performance remain. Follow the aircraft's published go-around procedure and applicable ATC instructions.

Procedure Summary A safe landing is a continuous sequence of coordinated actions and decisions.

Establish the descent on base, intercept final in coordinated flight, stabilize the approach, maintain control through the flare, land on the main wheels, control the landing roll and clear the runway. Go around whenever a safe landing cannot be assured.

01Base Leg
02Base-to-Final
03Final Approach
04Short Final
05Roundout & Flare
06Touchdown
07Landing Roll
08Runway Exit
Landing Safety & Error Recognition

Common Landing Errors and Recovery

Learning to recognize landing errors is as important as learning the normal landing procedure. Small deviations in airspeed, pitch attitude, descent rate or directional control can develop into serious problems when the airplane is close to the ground. The pilot must identify what is happening, understand the risk and respond before the situation becomes unsafe.

Recognize the Error Before Trying to Correct It

Not every poor landing begins with the same mistake. An airplane floating along the runway has a different problem from one ballooning upward during the flare. Similarly, bouncing after touchdown is not the same as wheelbarrowing on the nosewheel. Each condition requires an appropriate response, and some situations call for an immediate go-around rather than another attempt to correct the landing.

1 Excessive Approach Speed and Floating

Floating occurs when the airplane continues flying above the runway longer than intended during the roundout and flare. Excessive approach speed is a common cause because the airplane has more energy than necessary for the landing.

Recognize The Airplane Will Not Settle

The airplane remains just above the runway while the planned touchdown area passes beneath it. Airspeed decreases slowly, and an increasing portion of the available runway is consumed before touchdown.

Why It Happens Excess Energy

The airplane may have crossed the threshold too fast, carried unnecessary power or entered the flare with excessive energy. The wings continue generating enough lift to delay touchdown.

Pilot Response Avoid Forcing the Landing

Maintain a safe landing attitude and manage power according to the aircraft procedure. Do not push the nose down to force wheel contact. If the remaining runway is inadequate, go around when safe.

Prevention

Establish the recommended approach speed early. A stabilized approach with appropriate energy management reduces the likelihood of excessive floating over the runway.

2 High Roundout and Early Flare

A high roundout occurs when the pilot begins leveling the airplane too far above the runway. The airplane may lose considerable airspeed while still too high for a safe touchdown.

Recognize The Airplane Levels Off Too High

The descent is reduced prematurely, leaving the airplane higher above the surface than intended. As airspeed decreases, the airplane may begin sinking rapidly.

Why It Matters Loss of Lift Above the Runway

If the pilot holds the airplane too high while airspeed decays, the remaining lift may be insufficient to support a gradual settlement. A hard landing or stall-induced drop can result.

Pilot Response Preserve Airspeed and Control

Avoid abrupt elevator inputs or allowing the airplane to stall above the runway. Follow the aircraft's recommended recovery technique. If height and airspeed make a safe landing doubtful, go around when possible.

Prevention

Develop the correct visual picture of runway height during training. Begin the roundout at an appropriate height for the airplane rather than relying on a fixed point in the windshield.

3 Ballooning During the Flare

Ballooning happens when the airplane climbs or rises noticeably during the roundout, instead of smoothly reducing its descent rate. It is commonly caused by an excessive or abrupt increase in pitch attitude.

Recognize The Airplane Starts to Climb

After the pilot raises the nose, the airplane begins moving away from the runway. As the climb slows, airspeed may decrease rapidly, leaving the airplane vulnerable to a sudden descent.

Why It Happens Excessive Pitch Change

A rapid or excessive back-elevator input, particularly with surplus airspeed, may generate enough additional lift to make the airplane climb temporarily.

Pilot Response Avoid Abrupt Pitch Reversal

A small balloon may be manageable with smooth attitude and power adjustments in accordance with the aircraft's procedure. A pronounced balloon, rapid airspeed loss or uncertain control requires a go-around when safely possible.

Never Push the Nose Sharply Down After Ballooning

A sudden forward elevator input can turn a balloon into an excessive descent or nosewheel-first touchdown. Maintain positive control and avoid trying to force the airplane back onto the runway.

4 Late Roundout and Hard Landing

A hard landing can occur when the airplane reaches the runway with an excessive vertical descent rate. Beginning the roundout too late, insufficiently reducing the sink rate, or making an abrupt last-second correction can contribute to the problem.

Recognize Excessive Sink Near Touchdown

The runway approaches rapidly, but the airplane has not transitioned sufficiently from descent to landing attitude. The wheels contact the surface with an unusually strong impact.

Why It Matters High Landing Gear Loads

A hard touchdown can overload the landing gear, damage tires or structural components, and cause a subsequent bounce. A nosewheel-first impact creates additional risks.

Pilot Response Maintain Control

Do not try to stop the descent with a violent pitch-up. If an unusually hard touchdown occurs, maintain directional control and assess the airplane's condition. A potentially damaging landing requires appropriate inspection before further flight.

Prevention

Use outside runway references and peripheral vision to judge height. Begin the roundout at the correct time and reduce the descent rate smoothly rather than making an abrupt correction immediately before touchdown.

5 Bounced Landing and Porpoising

A bounced landing occurs when the airplane strikes the runway and becomes airborne again. Porpoising is a more serious oscillation in pitch, often involving repeated nosewheel and main-wheel contacts on the runway. These conditions must not be treated as identical.

Bounced Landing One Impact Followed by a Rebound

The airplane contacts the runway too firmly or in an unsuitable attitude, then rebounds into the air. A small bounce may be manageable using the airplane's recommended technique, provided control and sufficient runway remain. A major bounce calls for a go-around when safe.

Porpoising Repeated Pitch and Wheel-Contact Oscillations

The airplane alternates between excessive nose-down and nose-up attitudes as it contacts the runway. The oscillations can become progressively more severe and may overload the nose gear. Do not attempt to salvage a severe porpoising landing.

Avoid Chasing the Runway With Elevator Inputs

Repeated forward and aft elevator movements may increase the oscillations. If the airplane is bouncing severely or porpoising, initiate the published go-around procedure when safely possible and maintain positive directional control.

6 Wheelbarrowing — Excessive Nosewheel Loading

Wheelbarrowing occurs when too much of the airplane's weight is carried by the nosewheel during the landing roll. It is particularly dangerous in a tricycle-gear airplane because the nosewheel is not designed to carry the airplane's weight in the same manner as the main landing gear.

Recognize The Airplane Pivots on the Nosewheel

The nosewheel carries excessive weight while the main wheels provide reduced support. Directional control may deteriorate, and the airplane may begin swerving or pivoting around the nosewheel.

Common Causes Too Much Speed and Forward Elevator

A common cause is touching down on the main wheels and nosewheel almost simultaneously at excessive speed, followed by forward elevator pressure. This places excessive load on the nosewheel.

Pilot Response Reduce Nosewheel Loading

Smoothly applying back-elevator pressure may help restore a more appropriate landing attitude. However, a prompt go-around may be advisable when runway and operating conditions allow it to be performed safely.

Why Is Wheelbarrowing So Dangerous?

With too much weight concentrated on the nosewheel, the main wheels may provide less effective braking and directional stability. The airplane can become difficult to keep straight, especially when wind or uneven runway conditions add directional forces.

If a go-around is no longer safely practical, the priority is to maintain control of the airplane while reducing speed in accordance with the aircraft's recommended procedures. Avoid abrupt control or braking inputs that could worsen directional instability.

Prevention

Approach at the recommended speed, establish the correct landing attitude, touch down on the main wheels first and allow the nosewheel to lower gently as airspeed decreases.

7 Touchdown With Sideways Drift or Misalignment

A safe touchdown requires the airplane's movement and orientation to be appropriate for the runway. Touching down while drifting sideways, or while the fuselage remains significantly misaligned with the direction of travel, can impose excessive side loads on the landing gear.

Recognize Sideways Motion at Touchdown

The airplane may be tracking toward one side of the runway or its longitudinal axis may not align with its direction of travel. The wheels contact the runway while sideways motion remains significant.

Why It Matters Side Loads and Directional Instability

Sideways wheel contact can create abrupt forces on the landing gear, tires and airframe. It can also cause the airplane to swerve during the early landing roll.

Pilot Response Maintain Alignment and Drift Control

Use coordinated rudder and aileron inputs appropriate to the wind conditions and aircraft procedure. If suitable alignment and drift control cannot be established before touchdown, go around when safe.

Prevention

Maintain the runway's intended ground track during final approach. Anticipate wind changes and use the proper landing technique for the conditions. Significant crosswinds require specific crosswind landing techniques.

8 Loss of Directional Control During Landing Roll

Even after a normal touchdown, the airplane remains vulnerable to directional-control problems until it has slowed sufficiently. Wind, improper steering, uneven braking or poor runway traction can contribute to an excursion.

Recognize Difficulty Maintaining a Straight Roll

The airplane begins moving away from the runway centerline, requires unusually large steering corrections or becomes unstable during braking.

Why It Happens Reduced Traction or Improper Inputs

Excessive braking, poor tire grip, inappropriate flight-control inputs or abrupt steering can reduce directional stability. Wet or contaminated surfaces may make the problem worse.

Pilot Response Maintain Control and Decelerate

Keep looking ahead and use the airplane's appropriate directional controls and braking technique. Avoid abrupt inputs and premature high-speed turns toward a taxiway.

Prevention

Continue actively controlling the airplane throughout the landing roll. Use braking appropriate to the actual runway conditions and reduce to a safe taxi speed before attempting a runway exit.

! When Should You Go Around?

The correct decision is not always to continue correcting the landing. If the approach or touchdown becomes unsafe, a go-around may be the better option when it can still be performed safely. Recognize warning signs early, before altitude, runway or aircraft-control margins become critically limited.

  • Unstable approach: the airplane cannot maintain appropriate speed, glidepath or alignment with normal corrections.
  • Excessive floating: the touchdown area is passing beneath the airplane and inadequate runway may remain for stopping.
  • Serious ballooning or bouncing: pitch attitude, airspeed or touchdown control becomes uncertain.
  • Porpoising: repeated pitch oscillations and wheel impacts make a controlled landing doubtful.
  • Unsafe touchdown conditions: significant sideways drift, misalignment, an obstructed runway or another condition prevents a safe landing.
A Go-Around Is Not Always Practicable After Touchdown

Once the airplane is rolling on the runway, the feasibility of a go-around depends on airspeed, runway remaining, aircraft performance and the degree of control. Do not assume that applying full power is always the safest response to a problem on the ground. Follow the aircraft's procedures and maintain control of the airplane.

Remember Identify the problem, preserve aircraft control and make an early decision.

Floating, ballooning, bouncing, porpoising and wheelbarrowing are different landing problems. Avoid abrupt elevator corrections and never force the airplane onto the runway. The correct response depends on the aircraft's attitude, airspeed, height, runway remaining and operating conditions. When a safe landing cannot be assured, discontinue the attempt if a go-around remains safe.

Visual Landing Safety

Runway Width and Slope Illusions

During a visual landing approach, pilots rely heavily on the apparent size, shape and perspective of the runway to judge their height and distance. However, these visual cues can be misleading when an unfamiliar runway is narrower, wider, uphill or downhill. The resulting visual illusions can cause a pilot to fly an approach that is too low or too high, even when the runway initially appears correctly positioned.

The Runway May Look Wrong Even When the Glidepath Is Correct

Pilots develop a familiar visual picture from the runways they regularly use. When the geometry of another runway differs from that familiar picture, the pilot may incorrectly interpret the airplane's height. Reacting to that impression without checking other flight references can lead to an unsafe approach.

Runway Width Illusion

Runway width affects how large the runway appears in the windshield at a given distance and altitude. A pilot accustomed to a particular runway width may misjudge height when approaching a runway that is significantly narrower or wider than usual.

Narrow Runway

The Airplane Appears Too High

A narrower-than-usual runway occupies less space in the pilot's forward view. This can make the airplane appear higher than it actually is.

Visual Impression "I am too high above the runway."
Possible Pilot Reaction Descend below the intended glidepath.
Potential Risk Low approach, obstacle contact or landing short.
Wide Runway

The Airplane Appears Too Low

A wider-than-usual runway occupies more space in the pilot's forward view. This can make the airplane appear lower than it actually is.

Visual Impression "I am too low above the runway."
Possible Pilot Reaction Fly above the intended glidepath or begin the roundout too high.
Potential Risk High approach, excessive floating, hard landing or long touchdown.
Runway width illusion diagram comparing a narrow runway that can cause an excessively low approach with a wide runway that can cause an excessively high approach
Figure — Runway Width Illusion. A narrow runway may make the airplane appear too high, while a wide runway may make it appear too low. The illustrated red paths show possible responses to these illusions.
Practical Example

Imagine a pilot who normally trains on a wide paved runway and then approaches a much narrower runway at an unfamiliar airport. Even on the correct glidepath, the pilot may feel unusually high. The temptation is to descend more aggressively. Recognizing the width illusion helps the pilot resist that reaction and maintain the appropriate approach path.

Runway Slope Illusion

A runway that slopes uphill or downhill can also change the pilot's perception of height. The apparent angle of the runway surface may make the airplane seem higher or lower than it actually is, particularly when the pilot is unfamiliar with the airport or the surrounding terrain.

Upsloping Runway

The Airplane Appears Too High

An uphill runway rises in the direction of landing. Its perspective can create the impression that the airplane is higher than it really is.

Visual Impression "I am higher than I should be."
Possible Pilot Reaction Descend below the intended approach path.
Potential Risk Low approach, reduced obstacle clearance or undershooting.
Downsloping Runway

The Airplane Appears Too Low

A downhill runway falls away in the direction of landing. Its perspective can make the airplane appear lower than its actual position.

Visual Impression "I am too low on the approach."
Possible Pilot Reaction Fly above the intended glidepath.
Potential Risk High approach, late touchdown or runway overrun.
Runway slope illusion diagram comparing a downsloping runway that can lead to a high approach and an upsloping runway that can lead to a low approach
Figure — Runway Slope Illusion. A downsloping runway can create the impression of being too low; an upsloping runway can create the impression of being too high. Both can lead to incorrect glidepath corrections.
Visual Illusion vs. Actual Landing Performance

Do not confuse the visual illusion created by runway slope with its actual effect on landing performance. A downhill runway generally increases the distance required to stop, while an uphill runway generally assists deceleration. These performance effects must be evaluated separately from the pilot's perception of approach height.

How to Prevent Runway Visual Illusions

Runway illusions become less dangerous when the pilot knows what to expect before beginning the approach. The goal is to establish independent references instead of relying only on how the runway looks.

  1. Review Runway Information Before Arrival

    Check the destination's runway width, length, elevation and slope using current airport information. Identify characteristics that differ from the runways you normally use.

  2. Anticipate the Expected Illusion

    If the runway is unusually narrow or slopes uphill, be alert for the impression of being too high. If it is unusually wide or slopes downhill, anticipate the impression of being too low.

  3. Use Available Glidepath Guidance

    When available and appropriate, use PAPI, VASI or published vertical approach guidance to cross-check your visual judgment. Do not alter an appropriate descent path solely because the runway's appearance seems unfamiliar.

  4. Cross-Check the Flight Instruments

    Monitor airspeed, altitude and descent rate along with outside references. Instrument indications help reveal unexpected deviations, although the altimeter alone does not establish obstacle clearance.

  5. Maintain a Stabilized Approach

    Establish the correct airspeed, landing configuration, runway alignment and intended glidepath. Avoid making large corrections based only on visual impressions. If the approach becomes unstable, go around.

Do Not Trust Runway Perspective Alone

An unfamiliar runway may appear unusually close, far away, high or low even when the airplane is following an appropriate glidepath. Surrounding terrain and poor visual conditions can make these impressions more difficult to interpret.

Maintain a safe descent path, use independent references whenever available and discontinue the landing if the airplane cannot be stabilized safely.

Remember Narrow and uphill runways can make you feel too high. Wide and downhill runways can make you feel too low.

The danger is not the visual impression itself, but making an incorrect flight-path correction because of it. Anticipate unfamiliar runway geometry, cross-check available glidepath guidance and maintain a stabilized approach.
Narrow Runway Appears too high → Risk of low approach
Wide Runway Appears too low → Risk of high approach
Upsloping Runway Appears too high → Risk of low approach
Downsloping Runway Appears too low → Risk of high approach
Pre-Flight Knowledge Check

Normal Landing Review Questions

Test your understanding of normal approach and landing techniques before your next flight lesson. These questions review landing performance, airspeed, flap configuration, visual references, approach corrections, the landing sequence and common landing errors.

How to Use These Review Questions

Read each question and try to answer it before opening the explanation. Focus on understanding the reason behind each answer rather than simply memorizing a procedure. For actual flight operations, use your aircraft's AFM/POH, approved checklists and instructor guidance.

Part 1 — Landing Fundamentals

Review the factors that influence landing distance, approach speed, aircraft configuration and visual glidepath judgment.

What factors affect landing distance, and what is the difference between ground roll and total landing distance?
Answer & Explanation

Landing distance is affected by aircraft weight, density altitude, wind, runway slope, surface condition, configuration and pilot technique. These factors influence touchdown groundspeed, stopping performance or the distance traveled before touchdown.

Ground roll is the distance traveled from touchdown to a complete stop. Total landing distance includes the airborne portion of the landing and the ground roll. Many airplane performance charts specify total distance over a 50-foot obstacle.

Remember

Always compare the correct AFM/POH landing distance with the runway distance actually available, including an appropriate safety margin.

What is the traditional rule of thumb for final approach speed, and should it replace the AFM/POH?
Answer & Explanation

A traditional training reference is approximately 1.3 times VSO, the stall speed or minimum steady flight speed in the specified landing configuration.

However, this relationship is not a universal final approach speed. The correct speed depends on the airplane, its configuration, operating weight and applicable conditions.

Always use the manufacturer's recommended final approach speed, with any appropriate published adjustments.

Remember

VSO is a stall-speed reference, not an approach-speed target. The AFM/POH takes priority over a general rule of thumb.

What are the main advantages of extending flaps for landing, and what airspeed limitation must be observed?
Answer & Explanation

Flap extension changes the wing's lift and drag characteristics. Depending on the airplane and configuration, flaps can:

  • Allow a lower recommended landing speed.
  • Increase drag and permit a steeper approach without an unwanted increase in airspeed.
  • Help reduce landing distance when used as specified by the manufacturer.

The pilot must respect VFE, the maximum permitted flap-extended speed for the applicable flap position. Some airplanes have different speed limits for partial and full flaps.

Remember

Know both the planned landing flap setting and its operating speed limit before extending the flaps.

How does the aiming point move in the windshield when an airplane is approaching short of or beyond the intended landing area?
Answer & Explanation

On a stable approach, the aiming point appears approximately stationary while the runway image expands around it.

  • Stationary aiming point: the current flight path is converging toward that reference.
  • Aiming point moving upward: the projected flight path tends to fall short of the reference.
  • Aiming point moving downward: the projected flight path tends to extend beyond the reference.

These visual cues should be interpreted with a reasonably stable aircraft attitude and cross-checked against other flight references.

Remember

The aiming point is not normally the actual touchdown point. The airplane travels farther along the runway during the flare.

Part 2 — Approach and Landing Procedure

Check your understanding of approach corrections, the base-to-final turn, stabilized final approach and touchdown.

On final approach, the airplane is too low and its airspeed is also too low. What should the pilot do?
Answer & Explanation

If sufficient altitude and distance remain, the pilot should add power and coordinate pitch adjustments to restore a safe airspeed and regain the intended approach path.

Simply pulling back on the elevator to stretch the glide is dangerous. It may further reduce airspeed, increase induced drag and reduce the margin above the stall.

Safety Decision

If the airplane cannot safely regain the appropriate glidepath and airspeed, initiate a go-around rather than continuing an unsafe low approach.

How should a pilot respond to an approach that is too high or excessively steep?
Answer & Explanation

A small deviation may be corrected early by coordinating power reduction and pitch adjustment to establish a suitable descent toward the intended glidepath.

If permitted by the aircraft's procedure and limitations, the appropriate flap configuration may help manage drag. The pilot must maintain the recommended approach airspeed.

Do not dive toward the runway, allow airspeed to increase excessively or force the airplane into an unstable descent.

Remember

If a safe, stabilized approach cannot be reestablished with normal corrections, go around.

When does the descent begin in the traffic pattern taught in this lesson, and why is the base-to-final turn critical?
Answer & Explanation

In the traffic pattern described in this course, the airplane maintains traffic pattern altitude on downwind and begins the planned descent on the base leg.

The base-to-final turn must be coordinated, with an appropriate bank angle, airspeed and obstacle clearance. The pilot should anticipate the rollout to intercept the extended runway centerline.

Critical Error to Avoid

Never use excessive inside rudder to force an overshooting base-to-final turn. A skidding turn at low altitude can lead to an accelerated stall and spin.

How are airspeed and glidepath controlled on final approach, and what indicates a stabilized approach?
Answer & Explanation

Pitch and power work together to control airspeed and flight path. On a typical powered approach, pitch attitude is an important control for airspeed, while power changes strongly affect the descent path. However, changing either also affects the other, so corrections must be coordinated.

A stabilized final approach is characterized by:

  • The recommended approach airspeed.
  • The intended landing configuration.
  • An appropriate and controlled glidepath.
  • Alignment with the runway centerline or appropriate wind-corrected track.
  • Only small corrections needed to maintain the planned approach.
Remember

A stable approach should be established before reaching the runway, not improvised during the flare.

Part 3 — Touchdown, Errors and Safety

Identify abnormal landing situations, understand the correct touchdown attitude and recognize when a go-around is the safer decision.

Which wheels should touch the runway first in a normal tricycle-gear landing, and what is the purpose of the flare?
Answer & Explanation

In a normal landing with a tricycle-gear training airplane, the main wheels should touch first. The nosewheel should then lower smoothly as airspeed decreases.

The purpose of the roundout and flare is to reduce the airplane's descent rate, establish the appropriate landing attitude and allow a controlled touchdown.

The pilot uses progressively adjusted elevator pressure, appropriate power reduction and outside visual references to complete the maneuver.

Remember

Do not force the nosewheel onto the runway. Maintain runway alignment and continue controlling the airplane throughout the landing roll.

What is the difference between floating, ballooning, bouncing and porpoising during landing?
Answer & Explanation
  • Floating: the airplane continues flying above the runway longer than intended, often because of excessive approach speed.
  • Ballooning: the airplane rises during the flare, usually following an excessive pitch increase.
  • Bouncing: the airplane contacts the runway and rebounds into the air.
  • Porpoising: repeated pitch oscillations and wheel contacts occur, potentially placing excessive loads on the nose gear.

A minor deviation may be manageable with the aircraft's recommended technique. Severe ballooning, bouncing or porpoising can rapidly become unsafe.

Safety Decision

Never chase the runway with abrupt elevator movements. If a controlled landing is no longer assured, go around when safe to perform.

What is wheelbarrowing, what causes it, and how should the pilot respond?
Answer & Explanation

Wheelbarrowing occurs when excessive weight is carried by the nosewheel during the landing roll. The main landing gear may provide reduced support, and directional control can deteriorate.

It is often associated with excessive touchdown speed, an insufficient landing attitude or inappropriate forward elevator pressure.

Depending on the situation, smooth back-elevator pressure may help reduce nosewheel loading. A go-around may be preferable if the airplane's condition, speed and remaining runway allow it to be performed safely.

Important

A go-around is not automatically the safest option once the airplane is rolling on the ground. Maintain control and follow the aircraft's recommended procedures for the actual situation.

How do runway width and slope affect visual height perception, and when should the pilot discontinue the landing?
Answer & Explanation

Runway geometry can create misleading visual impressions:

  • Narrow runway: the airplane may appear too high, encouraging an excessively low approach.
  • Wide runway: the airplane may appear too low, encouraging an excessively high approach.
  • Upsloping runway: the airplane may appear too high, encouraging a low approach.
  • Downsloping runway: the airplane may appear too low, encouraging a high approach.

The pilot should anticipate these illusions and cross-check runway perspective with available glidepath guidance and instruments.

Discontinue the landing if the approach cannot remain stabilized, the airplane cannot be aligned safely, the runway is obstructed, or a safe touchdown and stopping distance cannot be assured.

Remember

A go-around is a normal safety decision, not a failed landing. Use the published aircraft procedure whenever a go-around is required and safe to perform.

Final Knowledge Check Can you explain the entire landing sequence without looking at the answers?

Start with the descent on base, describe how to establish a stabilized final approach, explain the flare and main-wheel touchdown, and finish with landing-roll control. You should also be able to recognize common landing errors, anticipate visual illusions, and explain when a go-around is the safer decision.

error:
Study flight
Logo