Normal Takeoff: Roll, Rotation & Initial Climb

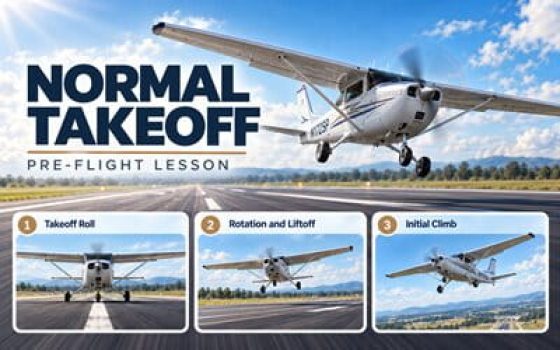
Normal takeoff showing takeoff roll, rotation, liftoff and initial climb
Pre-flight lesson Takeoff & Circuit
Lesson Objective

In this lesson, you will learn how to plan and perform a normal takeoff from a firm runway under typical operating conditions. You will study the factors that affect takeoff performance, the three phases of the takeoff, takeoff distance and ground roll, aircraft-specific takeoff speeds, and the correct step-by-step sequence from the takeoff roll through rotation, lift-off and initial climb.

You will also learn how to recognize common takeoff errors and hazards. Exact aircraft configuration, speeds and limitations must always come from the approved AFM/POH. This lesson builds on the directional-control and coordination skills developed in the Turn Pre-Flight Lesson .

Why Learn the Normal Takeoff?
Turn runway acceleration into a safe, controlled climb

A successful takeoff begins before the airplane starts moving. The pilot must know that the available runway, aircraft performance and operating conditions are suitable, then maintain directional control, accelerate normally, rotate at the appropriate speed and establish a stable initial climb.

Performance Know what the airplane can do

Understand how weight, density altitude, wind, runway condition and aircraft configuration affect takeoff distance and climb performance.

Takeoff Sequence Understand the three phases

Follow the progression from takeoff roll to lift-off and then to the initial climb.

Airspeed Use the correct aircraft-specific speeds

Know when to rotate and which climb speed is appropriate for the situation, using the values specified in the aircraft AFM/POH.

Aircraft Control Stay aligned from runway to climb

Maintain directional control during acceleration, establish the correct takeoff attitude smoothly, and transition into a stable climb after lift-off.

Basic Idea

What Is a Normal Takeoff?

A normal takeoff is the standard procedure used to transition an airplane from a firm runway into a controlled initial climb when no special short-field, soft-field or significant crosswind technique is required.

Simple Definition

From runway acceleration to a stable climb

During a normal takeoff, the airplane accelerates along the runway until sufficient airspeed and control effectiveness are available for lift-off. The pilot then establishes the appropriate takeoff attitude and transitions smoothly into the initial climb at the airspeed specified for the airplane.

Wind Take off as nearly into the wind as practical

A headwind reduces the groundspeed required to reach flying airspeed and normally shortens the ground roll. Any approved tailwind operation must be evaluated using the aircraft AFM/POH performance data.

Runway Use a firm surface with adequate length

A normal takeoff assumes a suitable runway that allows the airplane to accelerate normally to lift-off speed without requiring a specialized short-field or soft-field technique.

Flight Path Transition smoothly into the initial climb

Directional control, rotation and lift-off should form one continuous sequence that ends with the airplane established in a stable climb at the appropriate aircraft-specific airspeed.

Remember A normal takeoff is a continuous transition: accelerate on the runway → lift off smoothly → establish a stable initial climb.
Takeoff Performance

Factors That Affect Takeoff Performance

Takeoff performance is not fixed. The same airplane may need more or less runway depending on its weight, air density, wind, runway conditions and configuration. These factors must be checked before every takeoff.

Performance Planning

Use the aircraft performance data

Use the approved AFM/POH for the airplane and the actual conditions of the takeoff. Do not assume that the airplane will perform today exactly as it did on a previous flight.

Weight More weight reduces performance

A heavier airplane usually accelerates more slowly, needs a longer takeoff distance and climbs less well after lift-off.

Air Density High density altitude reduces performance

High elevation, high temperature and low pressure can create high density altitude. In less dense air, the airplane needs more runway and climbs less well.

Wind Headwind helps — tailwind hurts

A headwind reduces the groundspeed needed for lift-off and usually shortens the takeoff roll. A tailwind increases the groundspeed and the distance required.

Runway Surface Surface condition affects acceleration

Grass, soft ground, standing water, snow or slush can increase rolling resistance and make the takeoff roll longer.

Runway Slope Uphill usually increases takeoff distance

An uphill runway reduces acceleration and usually increases takeoff distance. A downhill runway may improve acceleration, but wind and other conditions must also be considered.

Configuration Use the correct takeoff configuration

Flap setting and aircraft configuration affect lift and drag. Use the takeoff configuration given in the AFM/POH.

Wind Effect

Headwind vs tailwind

A headwind helps takeoff performance. The airplane needs less groundspeed to reach the airspeed needed for lift-off.

A tailwind has the opposite effect. The airplane must travel faster over the ground before lift-off, so more runway is needed.

Headwind
  • Lower groundspeed
  • Shorter takeoff distance
  • Better obstacle clearance
Tailwind
  • Higher groundspeed
  • Longer takeoff distance
  • Less performance margin
Effect of headwind and tailwind on takeoff distance
A headwind reduces the takeoff distance. A tailwind increases it.
Pressure & Density Altitude

Why density altitude matters

Pressure altitude is altitude based on standard atmospheric pressure. It can be found by setting the altimeter to 29.92 inHg.

Density altitude is pressure altitude corrected for temperature. High density altitude means that the air is less dense.

Less dense air reduces aircraft performance. The airplane usually needs a longer takeoff roll and its climb performance is reduced.

Density altitude and its effect on aircraft takeoff performance
Hover to enlarge
Air density has a major effect on takeoff and climb performance.
Use the published performance data

Use the performance charts, corrections and limits in the aircraft AFM/POH. Do not replace them with estimates or rules of thumb.

Remember More weight + higher density altitude + tailwind + uphill or high-resistance runway conditions usually mean more runway required and less climb performance.
Takeoff Sequence

The Three Stages of a Normal Takeoff

Although a normal takeoff is one continuous maneuver, it is easier to understand and practice when divided into three connected stages: takeoff roll, lift-off and initial climb. Each stage leads directly into the next.

1 Stage One Takeoff Roll

From brake release until the airplane leaves the runway, the aircraft accelerates while the pilot maintains directional control, monitors engine performance and keeps the airplane aligned with the runway.

2 Stage Two Lift-off

At the appropriate aircraft-specific speed, the pilot establishes the takeoff attitude smoothly. As sufficient lift develops, the airplane leaves the runway and begins accelerating toward the desired climb speed.

3 Stage Three Initial Climb

After lift-off, the pilot establishes the appropriate pitch attitude and climb airspeed while maintaining directional control and a safe flight path away from the runway.

Where Does Rotation Fit? Rotation is an action, not a separate takeoff stage

Rotation is the smooth pitch change used near the end of the takeoff roll to establish the takeoff attitude. It leads directly into lift-off rather than forming a separate stage of the maneuver.

Normal airplane takeoff showing takeoff roll, lift-off and initial climb
A normal takeoff progresses continuously from the takeoff roll through lift-off and into the initial climb.
Remember Takeoff roll → smooth rotation and lift-off → stable initial climb.
Runway Performance

Takeoff Distance and Ground Roll

Two distances are especially important when planning a takeoff: the distance the airplane travels while still on the runway and the total distance required to become airborne and clear an obstacle. They are related, but they are not the same measurement.

Ground Roll Runway distance before lift-off

Takeoff ground roll is the distance traveled along the runway from the beginning of the takeoff roll until the airplane lifts off.

Total Takeoff Distance Ground roll plus the airborne segment

When the AFM/POH provides a distance to clear a 50-foot obstacle, that figure includes the ground roll plus the airborne distance required to climb to 50 feet above the takeoff surface.

Ground Roll vs. Total Distance Over a 50-Foot Obstacle
Ground Roll
Airborne Distance
Start Lift-off 50 ft
Total distance over a 50-ft obstacle extends from the start of the takeoff roll to the point where the airplane reaches 50 feet above the takeoff surface.
Do Not Confuse These Terms

Takeoff roll is a phase — ground roll is a distance

Takeoff roll describes the first phase of the takeoff maneuver. Ground roll is the measured runway distance covered during that portion of the takeoff. The terms are closely related, but they describe different things.

Before Takeoff

Calculate the distance required for today's conditions

Use the aircraft AFM/POH performance data to determine the takeoff distance for the actual weight, pressure altitude, temperature, wind, runway surface, runway slope and approved aircraft configuration.

Then compare the calculated requirement with the runway available and consider any obstacles in the departure path. Performance figures from a previous flight should never replace the calculation for the current conditions.

Weight Use actual takeoff weight
Density Altitude Pressure altitude + temperature
Wind Apply published corrections
Runway Surface, slope and length
Stay within the published performance data

Use the procedures, corrections and limitations provided for the aircraft. Do not extrapolate beyond the limits of a performance chart unless the manufacturer specifically provides a method for doing so.

Remember Ground roll ends at lift-off. Total distance over a 50-foot obstacle continues beyond lift-off until the airplane reaches 50 feet above the takeoff surface.
Airspeed

Takeoff Speeds: Vr, Vx and Vy

During takeoff, different speeds have different meanings. Vr is linked to rotation. Vx and Vy are climb speeds. The exact speeds depend on the airplane.

Vr Rotation Speed Before lift-off

Vr tells the pilot when rotation starts. Rotation is the moment when the airplane's nose begins to rise. Lift-off happens after rotation.

Vx Best Angle Most altitude over distance

Vx is the best angle-of-climb speed. It gives the greatest altitude gain over the shortest horizontal distance.

Vy Best Rate Most altitude over time

Vy is the best rate-of-climb speed. It gives the greatest altitude gain in the shortest amount of time.

Important

Not every light airplane has a published Vr

Some light airplanes do not have a specific Vr. In that case, use the takeoff speeds and information given in the aircraft AFM/POH.

Vx or Vy?
Vx
Distance

Vx gives the most altitude over the shortest horizontal distance.

Vy
Time

Vy gives the most altitude in the shortest amount of time.

In a typical light airplane
Vx Lower climb speed
→
Vy Higher climb speed
Use the speeds for your airplane

Takeoff and climb speeds are not the same for every airplane. Always check the aircraft AFM/POH.

Remember Vr = rotation starts.
Vx = most altitude over distance.
Vy = most altitude over time.
Before Takeoff

Before Takeoff: Runway, Wind & Safety Checks

Before entering the runway and starting the takeoff, make sure you know which runway you are using, check the wind and traffic, and make sure the departure path is clear. This is the last chance to find a problem before takeoff.

Runway Confirm the correct runway

Check the runway number and direction. Make sure the runway has enough length for the takeoff and that the surface is suitable for the airplane.

Wind Check direction and speed

Know the wind direction and speed before takeoff. Check that the wind and any crosswind or tailwind component are within the limits for the airplane and the pilot.

Traffic Make sure the runway is clear

Look for aircraft on final approach, on the runway, crossing the runway or departing ahead of you. Do not rely only on the radio.

Departure Path Look ahead

Check the area beyond the runway. Know the planned departure direction and be aware of obstacles, terrain and other traffic.

Wind Check

Look at the wind before takeoff

Use the available wind information and look at the windsock when possible. The windsock gives a quick visual indication of wind direction and strength.

Compare the wind with the runway direction before you enter the runway. Do not use the windsock alone when more accurate wind information is available.

Windsock used to check wind direction before takeoff
A windsock gives a quick visual indication of wind direction and strength.

Controlled or non-towered airport?

Controlled Airport Follow the ATC clearance

Listen carefully to ATC and confirm the runway you are cleared to use. Do not start the takeoff until you have received a takeoff clearance.

Non-Towered Airport Listen, look and communicate

Listen on the appropriate frequency, check for traffic and announce your position and intentions on the CTAF before entering the runway.

Important “Line up and wait” is not a takeoff clearance

This instruction allows you to enter the runway and wait. Do not begin the takeoff roll until ATC gives you a separate takeoff clearance.

Takeoff Brief

Know the plan before you start

Before takeoff, review the important information for the departure. A short takeoff brief helps you know what to expect before the airplane starts moving.

Runway Correct runway and direction
Wind Direction and speed
Speeds Takeoff and climb speeds
Emergency Plan Know what you will do
Remember Correct runway + wind checked + runway and departure path clear + takeoff plan understood.
Takeoff Procedure

Takeoff Roll — Step by Step

The takeoff roll starts when the airplane begins to accelerate along the runway. Good directional control, correct power and quick instrument checks are essential during this phase.

1 Align & Check
2 Apply Power
3 Hold Centerline
4 Monitor
5 Rotation Speed
1

Align and make the final checks

Place the airplane on the runway centerline. The nosewheel should be straight and aligned with the runway.

Look far down the runway and select outside reference points that are aligned with the runway direction. Use them to help maintain the centerline.

Before Brake Release
Flight Controls Set correctly for takeoff and wind conditions.
Cabin Check Example: primer locked, master ON, magnetos BOTH, carb heat OFF, fuel selector set and heading indicator checked. Always use the checklist for your airplane.
Radio Takeoff clearance or appropriate CTAF call complete.
Runway Correct runway confirmed and departure path clear.
Airplane aligned with the runway at the beginning of the takeoff roll
Start with the nosewheel straight and the airplane aligned with the runway centerline.
During the Roll
2 Apply takeoff power

Release the brakes if they are being held. Keep your feet on the rudder pedals without pressing the brakes.

Apply power smoothly and continuously to the takeoff setting specified for the airplane.

3 Hold the centerline

Use the rudder to keep the airplane straight and aligned with the runway centerline.

As speed increases, the controls become more effective. Use smaller corrections and avoid steering with the brakes.

4 Monitor the airplane

Make quick instrument checks while keeping most of your attention outside.

Engine Normal
Airspeed Increasing
Direction Centered

Check RPM or power indication, oil pressure, temperature and other required engine indications for the airplane.

5

Reach rotation speed

Continue accelerating while maintaining the centerline. As speed increases, control response becomes stronger.

At the aircraft-specific rotation speed or takeoff speed, begin to raise the nosewheel and establish the takeoff attitude as described in the next section.

If the airplane does not have a published Vr, follow the takeoff procedure and speed given in the AFM/POH.

What about the elevator during the takeoff roll?

Avoid unnecessary elevator pressure during the initial roll. In a correctly trimmed nosewheel airplane, the elevator tends toward a neutral position as speed builds. Use the control position and technique specified for the airplane and the wind conditions.

Safety Continue only if the takeoff is developing normally

If the engine indications are abnormal, the airspeed is not increasing normally, directional control is poor, or another serious problem appears while sufficient runway remains, reject the takeoff according to the aircraft procedure.

Remember 1. Align and complete the final checks → 2. Release brakes and apply power → 3. Hold the centerline → 4. Check engine and airspeed → 5. Reach rotation speed.
Takeoff Procedure

Rotation and Liftoff — Step by Step

Rotation starts at the correct aircraft-specific speed. From this point, smoothly move the airplane to the takeoff attitude and allow it to leave the runway.

1 Begin Rotation
2 Takeoff Attitude
3 Liftoff
4 Stabilize
1

Begin the rotation

At the correct rotation speed or takeoff speed, smoothly begin to raise the nose.

Use the speed given for the airplane in the AFM/POH.

2

Set the takeoff attitude

Raise the nose smoothly to the normal takeoff attitude.

Use the outside view and the horizon to judge the pitch attitude. Avoid raising the nose too high.

Airplane rotating to the normal takeoff attitude
Smoothly establish the normal takeoff attitude.
Leaving the Runway
3 Allow the airplane to lift off

Hold the takeoff attitude and allow the airplane to leave the runway as enough lift develops. Do not force the airplane into the air.

4 Stabilize after liftoff

Keep the airplane under control and maintain the runway track. Allow the airspeed to move toward the recommended climb speed.

Important Do not force the airplane off the runway

Use a smooth rotation and the correct takeoff attitude. Pulling the nose too high can reduce airspeed and lead to poor takeoff performance.

Remember 1. Begin rotation → 2. Set the takeoff attitude → 3. Allow liftoff → 4. Stabilize after liftoff.
Takeoff Procedure

Initial Climb — Step by Step

After liftoff, establish a stable climb while controlling airspeed, pitch and direction. Use the recommended climb speed and configuration for your airplane.

1 Establish Climb
2 Climb Speed
3 Hold Track
4 Monitor
5 Transition & Trim
1

Establish the initial climb

After liftoff, hold a stable climb attitude and continue to fly the airplane smoothly away from the runway.

Use the outside horizon as your main pitch reference, then confirm the result with the airspeed indicator.

During the Initial Climb
2 Establish the climb speed

Allow the airplane to accelerate to the recommended initial climb speed.

For many light airplanes during a normal takeoff, this is Vy. Always use the speed specified in the AFM/POH.

Vy
Best Rate of Climb Most altitude gained in the least time.
3 Maintain the runway track

Keep the wings controlled and use the rudder as needed to maintain coordinated flight and the desired ground track.

With high power and low airspeed, left-turning tendencies can be noticeable. Apply the rudder pressure required to keep the airplane properly coordinated.

4 Monitor the climb

Continue scanning outside while making quick instrument checks.

Airspeed Correct
Engine Normal
Traffic Clear

Check pitch, airspeed, engine indications and surrounding traffic without losing outside reference.

5

Transition and trim

After reaching a safe altitude, transition to the recommended en-route or cruise-climb configuration for the airplane.

Adjust pitch for the required climb speed and make any power or configuration changes specified in the AFM/POH or aircraft checklist.

When the climb is stable, trim the airplane to reduce control pressure.

About 500 Feet AGL Do not treat 500 feet as a universal rule

Some training procedures use about 500 feet AGL as a point to transition from the initial climb to a cruise climb. The correct altitude, speed, power setting and configuration depend on the airplane, airport conditions and the procedure being used.

Important Control airspeed with pitch

If the airspeed becomes too low, reduce the pitch attitude as needed. If it becomes too high, adjust the pitch attitude toward the correct climb speed. Use smooth corrections and keep the airplane coordinated.

Remember 1. Establish the climb → 2. Set the correct climb speed → 3. Maintain track and coordination → 4. Monitor airspeed, engine and traffic → 5. Transition and trim.
Further Training

Continue Your Normal Takeoff Training with Pilot Institute

Want to go further? Continue with this related Pilot Institute training lesson for additional ground-school instruction on takeoff technique and procedures.

View the Training Lesson → Paid training course. Affiliate link — StudyFlight may earn a commission from qualifying purchases at no additional cost to you.
Takeoff Safety

Common Takeoff Errors and Hazards

A normal takeoff can quickly become unsafe if directional control, pitch or airspeed are not managed correctly. Some hazards also come from other aircraft operating nearby.

Common Errors
Direction

Losing the centerline

Strong power and propeller effects can make the airplane yaw during the takeoff roll and initial climb.

Large or delayed corrections can make directional control worse.

Correct Technique Look well ahead and use smooth rudder corrections to maintain the runway track.
Rotation

Lifting off too early

Trying to leave the runway before the airplane has enough speed can produce high drag and poor climb performance.

An excessive nose-up attitude can also cause the airspeed to decrease after liftoff.

Correct Technique Use the correct takeoff speed and make a smooth, controlled rotation.
Pitch

Holding the airplane down

Excessive forward elevator pressure can keep the airplane on the runway longer than necessary and place excessive load on the nosewheel.

It can also reduce acceleration and lead to wheelbarrowing.

Correct Technique Use the takeoff control technique specified for the airplane and avoid excessive forward pressure.
Wheelbarrowing
Nosewheel Hazard

Too much weight on the nosewheel

Wheelbarrowing occurs when excessive forward pressure causes too much of the airplane's weight to be carried by the nosewheel.

Directional control can become difficult because the airplane may tend to swerve or pivot around the nosewheel.

Avoid excessive forward elevator pressure and use the correct takeoff attitude. If directional control is lost or the takeoff becomes unsafe while sufficient runway remains, reject the takeoff according to the aircraft procedure.

Wake Turbulence

Stay clear of wingtip vortices

An airplane produces counter-rotating wingtip vortices while its wings are producing lift.

These vortices can create a strong rolling motion for an airplane that flies through them. The hazard is especially important behind larger aircraft.

Wake vortices are generally strongest when the generating airplane is heavy, clean and slow.

Wingtip vortices and wake turbulence behind an aircraft
Wingtip vortices trail behind an aircraft that is producing lift.
Wake turbulence avoidance during takeoff behind another aircraft
Plan your takeoff path to remain clear of the preceding aircraft's wake.
Taking Off Behind Another Aircraft

Avoid the preceding aircraft's wake

Note where the preceding larger aircraft rotates. When conditions and aircraft performance permit, rotate before that point and remain above its climb path until you are clear of the wake.

Avoid a flight path that crosses below and behind the preceding aircraft.

Watch the rotation point Know where the preceding aircraft became airborne.
Stay above its path Avoid climbing through the wake from below.
Consider the wind Wind can move the vortices across the runway.
Wait when necessary Do not rush the takeoff when wake separation is uncertain.
Another Common Error Do not fixate on the instruments

During the takeoff roll and initial climb, keep most of your attention outside. Use quick instrument checks to confirm airspeed and engine indications, but do not stare at the airspeed indicator and lose directional control or traffic awareness.
Remember Maintain directional control, rotate at the correct speed, avoid excessive nosewheel loading, keep your eyes outside and stay clear of wake turbulence.
Emergency Procedure

Engine Failure After Takeoff

An engine failure shortly after liftoff leaves very little time to react. Your first priority is always the same: maintain control of the airplane and protect the airspeed.

1 Lower the Nose
2 Best Glide
3 Landing Area
4 Prepare to Land
1

Lower the nose immediately

After an engine failure during the initial climb, do not try to hold the climb attitude. Without power, airspeed can decrease very quickly.

Lower the nose promptly to maintain flying speed and keep the airplane coordinated.

Pitch Lower the nose
Airspeed Protect it immediately
Control Stay coordinated
Once the Airplane Is Under Control
2 Establish the proper glide

Adjust pitch to establish the appropriate best glide speed for the airplane.

Use the airspeed specified in the AFM/POH. Do not try to stretch the glide by allowing the airplane to slow below the recommended speed.

3 Choose a landing area

Select a suitable landing area that you can realistically reach.

At low altitude, a landing generally ahead or slightly to one side gives more time to maintain control and prepare for touchdown.

Runway Remaining Land on the remaining runway if possible.
No Runway Remaining Choose the best reachable landing area.
4

Prepare for the landing

Fly the airplane toward the selected landing area and maintain the correct glide speed.

If altitude and time permit, complete the appropriate engine-failure and emergency checks from the aircraft checklist.

Your priorities remain aircraft control, airspeed and a controlled landing. Do not become distracted by troubleshooting when the ground is close.

The Turnback Decision

Do not improvise a turn back to the runway

A low-altitude turn back can require a large change in direction while the airplane is slow and descending. Bank angle also increases the risk of an accelerated stall if airspeed and coordination are not controlled.

A turn back should only be considered when it was part of the takeoff plan and the pilot knows that the airplane has enough altitude and glide performance to complete it safely.

Training The maneuver has been practiced safely beforehand.
Altitude Sufficient altitude exists for the complete maneuver.
Performance The airplane can actually glide back to the landing area.
Before Takeoff Decide what you will do before the airplane starts moving

Your takeoff briefing should include what you will do if the engine fails during the takeoff roll, after liftoff with runway remaining, and after liftoff with no usable runway remaining. Know your aircraft's emergency procedure before every takeoff.

Remember 1. Lower the nose → 2. Establish the proper glide speed → 3. Choose a reachable landing area → 4. Prepare for a controlled landing.
Knowledge Check

Normal Takeoff Review Questions

Check that you understand takeoff performance, takeoff speeds, runway control, rotation, initial climb and the main takeoff hazards. Try to answer each question before opening the answer.

10

These ten questions review the most important points from the complete Normal Takeoff Pre-Flight Lesson.

01 Performance

What are some of the main factors that affect takeoff performance?

Show Answer
Weight, air density, wind, runway conditions, runway slope and aircraft configuration.

These factors can change takeoff distance, acceleration and climb performance. Always use the aircraft performance data for the actual conditions.

02 Takeoff Sequence

What are the three stages of a normal takeoff?

Show Answer
Takeoff roll, liftoff and initial climb.

Rotation occurs during the transition from the takeoff roll to liftoff. It is an action, not a separate fourth stage.

03 Distance

What is the difference between ground roll and total takeoff distance?

Show Answer
Ground roll ends at liftoff.

Ground roll is the runway distance used before the airplane becomes airborne. Total takeoff distance to clear an obstacle also includes the airborne distance needed to reach that obstacle height.

04 Airspeeds

What do Vr, Vx and Vy mean?

Show Answer
Vr = rotation, Vx = best angle, Vy = best rate.

Vr is associated with beginning rotation. Vx gives the greatest altitude gain over distance. Vy gives the greatest altitude gain over time. Use the speeds published for your airplane.

05 Wind

How does a headwind normally affect takeoff distance and the climb path over the ground?

Show Answer
It normally reduces takeoff distance and makes the climb path steeper over the ground.

A headwind reduces the groundspeed needed to reach a given airspeed. It does not by itself increase the airplane's aerodynamic rate of climb through the surrounding air.

06 Direction

Why should you look far down the runway and select outside reference points before the takeoff roll?

Show Answer
They help you maintain directional control.

Looking well ahead makes it easier to detect small changes in direction and keep the airplane aligned with the runway centerline.

07 Takeoff Roll

What should you monitor as the airplane accelerates during the takeoff roll?

Show Answer
Direction, airspeed and engine indications.

Keep most of your attention outside while confirming that the airplane remains aligned, the airspeed is increasing and the engine indications are normal.

08 Wheelbarrowing

What can cause wheelbarrowing during takeoff?

Show Answer
Excessive forward pressure and excessive loading of the nosewheel.

Too much weight on the nosewheel can make directional control difficult and may cause the airplane to swerve.

09 Wake Turbulence

When taking off behind a larger aircraft, how can you reduce the risk of encountering its wake?

Show Answer
Avoid flying below and behind its flight path.

Note the preceding aircraft's rotation point. When conditions and performance permit, become airborne before that point and remain above its climb path. Consider wind movement of the vortices and allow additional spacing when needed.

10 Engine Failure

What is your first priority after an engine failure during the initial climb?

Show Answer
Maintain aircraft control and protect the airspeed.

Lower the nose promptly, establish the appropriate glide speed and select a reachable landing area. Do not hold the climb attitude or improvise an aggressive low-altitude turnback.

Final Check Can you explain the complete takeoff without looking back at the lesson?

You should be able to describe the factors that affect performance, the three stages of the takeoff, the important speeds, the takeoff roll, rotation and liftoff, initial climb, common hazards and your priorities after an engine failure.

Takeoff Flow Plan → Check → Align → Apply power → Maintain centerline → Rotate → Liftoff → Establish the climb → Monitor.
error:
Study flight
Logo